This first party section is all about the kiddos. I used the adorable Alphabet Soup line from My Mind's Eye to craft up these circus animal creations. I love the bright colors that really bring home the circus feel.
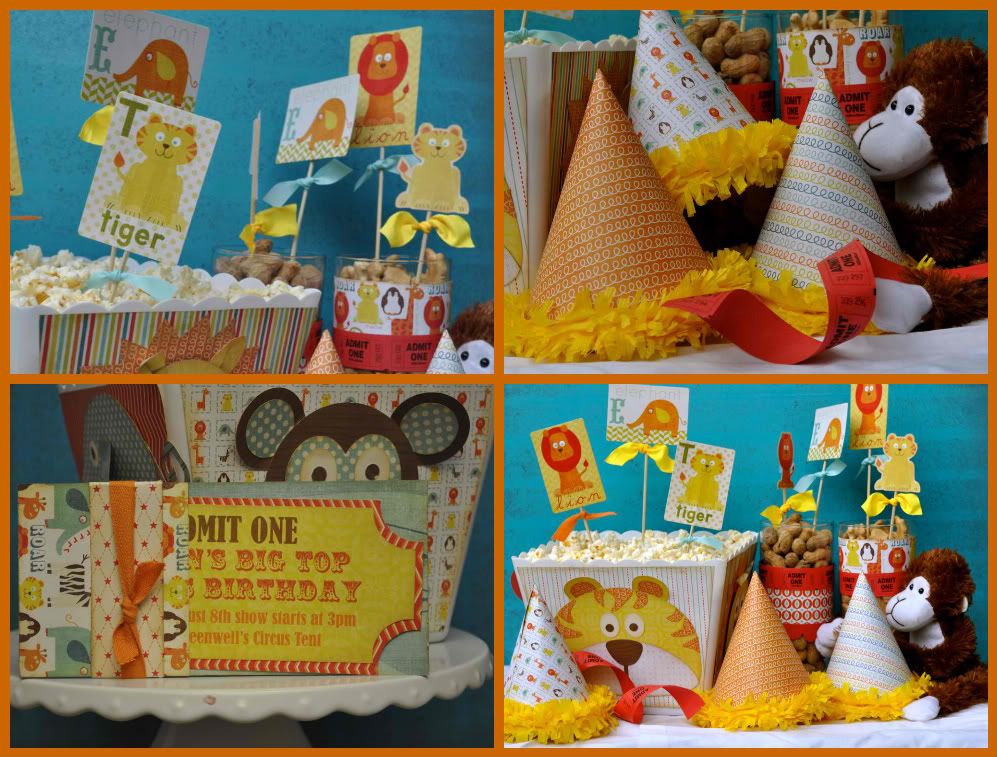
All of the decorative picks were created using the preprinted playing cards and die-cuts from the Alphabet Soup line. Just attach each shape to a BBQ skewer using a little adhesive, tie a ribbon and you are set to go. Skewers are a great way to add height and color to a centerpiece with very little expense
Every good party starts with a great invitation. This simple invite is one of my favorites (with a little added circus ticket twist)
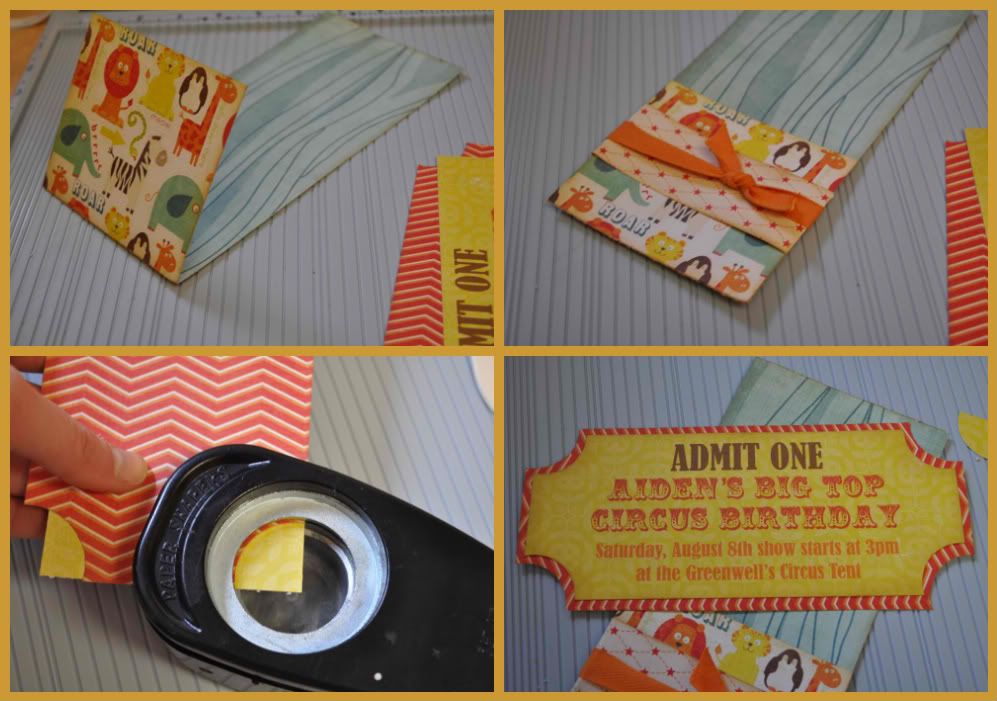
1. Cut a 4" strip from a 12X12 double sided patterned paper (you will get three invitations per piece)
2. Use your scor-pal (or scoring blade on your paper cutter) to scor and fold 3.5" from the bottom of the paper.
3. Wrap a strip of patterned paper or ribbon around the folded paper to secure it.
4. Tuck invitation in pocket.
The ticket shape is easy to create using a large circle punch as shown in the picture.
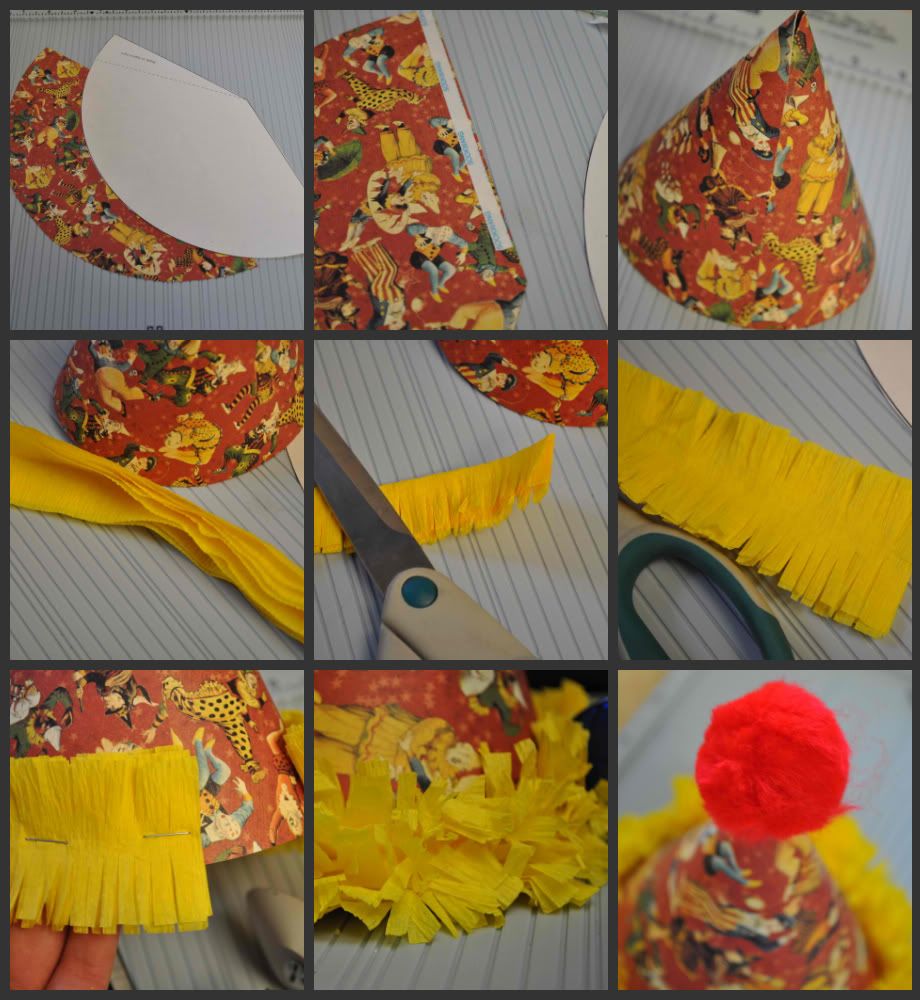
1. Download and print the party hat template
2. Trace the template onto your patterned paper and cut out
3. Apply adhesive (I used and loved scor-tape) as shown in template.
4. Fold hat and adhere as shown in template
5. Measure 4-6 lengths of crate paper to go around the hat's rim.
6. Fold layers in half and snip with scissors to create a fringed edge.
7. Open up folded strips and staple onto rim of hat.
8. Crinkle crate paper until it hides staples.
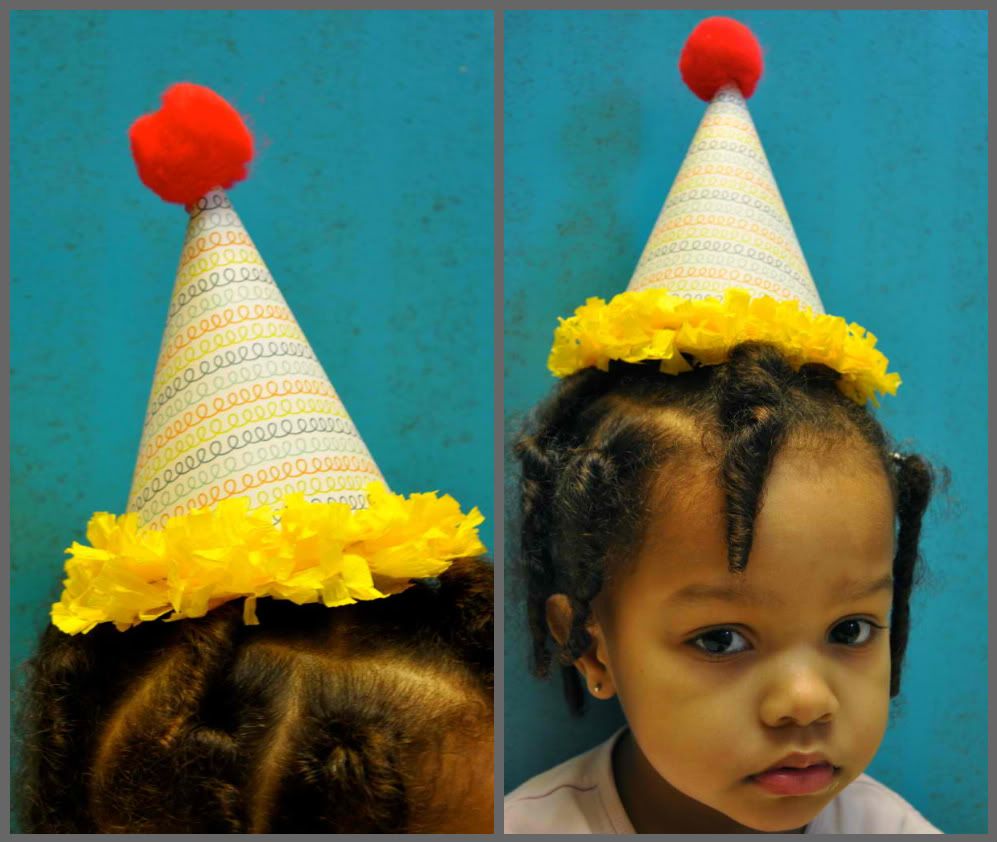
9. Hot glue a fuzzy ball to the tip of the hat.
10. Add elastic string or ribbon to hold onto head as desired.
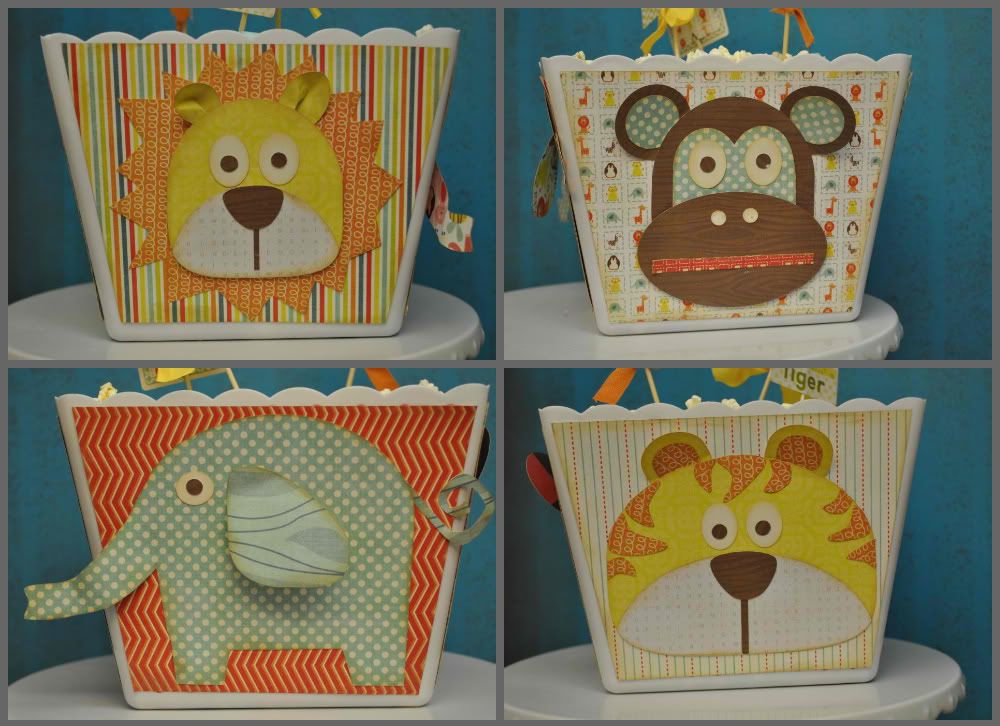
Elenor the Elephant
Leo the Lion Part 1
Leo the Lion Part 2
Mel the Monkey
Thomas the Tiger Part 1
Thomas the Tiger Part 2
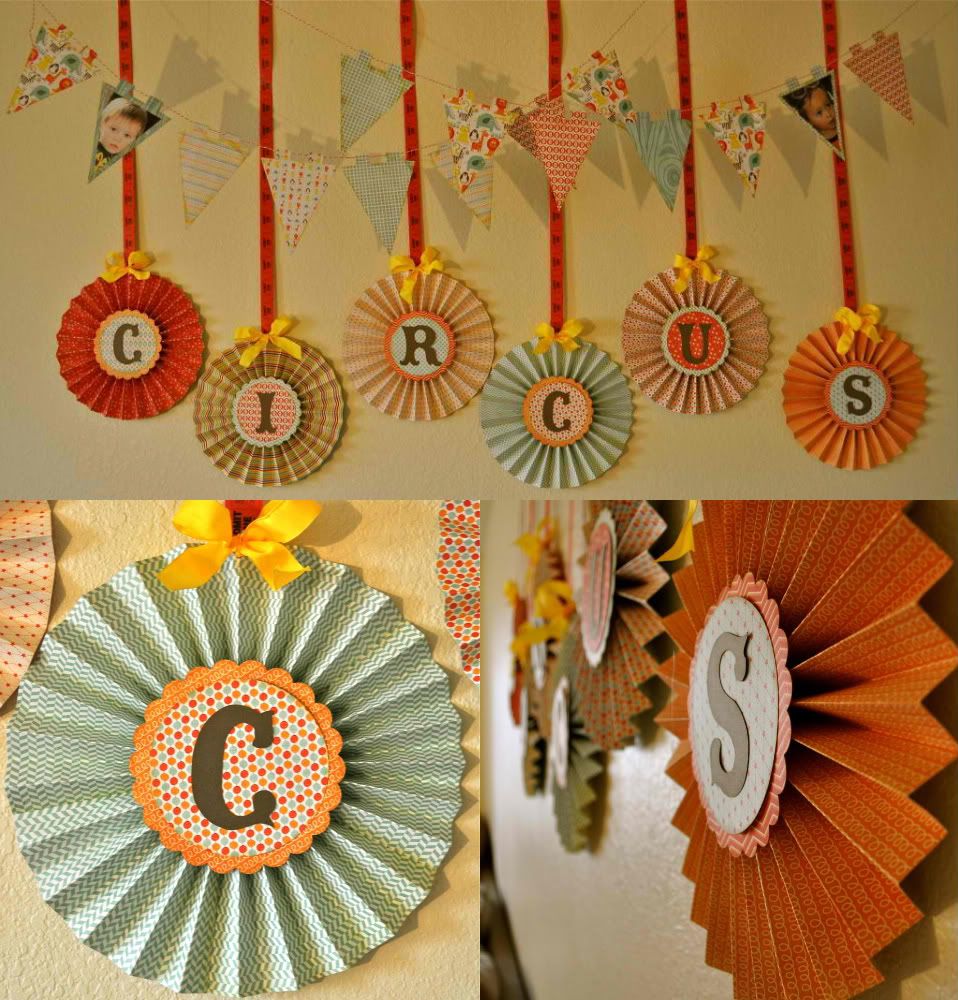
A banner is a fool proof way to scream party! I love using banners to dress up dull walls that seem to large to tackle with anything else. I especially love the vintage accordion banner because it fits perfectly with the circus theme. These little pieces are some of my favorites for dressing up my art. I love to make them in all different sizes. In fact, I used the same pattern to create lots of the clown creations you will see in part 2!
Here is a simple how to for creating the accordion folded pieces: (these are the instructions for creating the large 12X12 pieces, but keep in mind that you can make all different sizes by changing the size of your paper strips and the width of your fold)
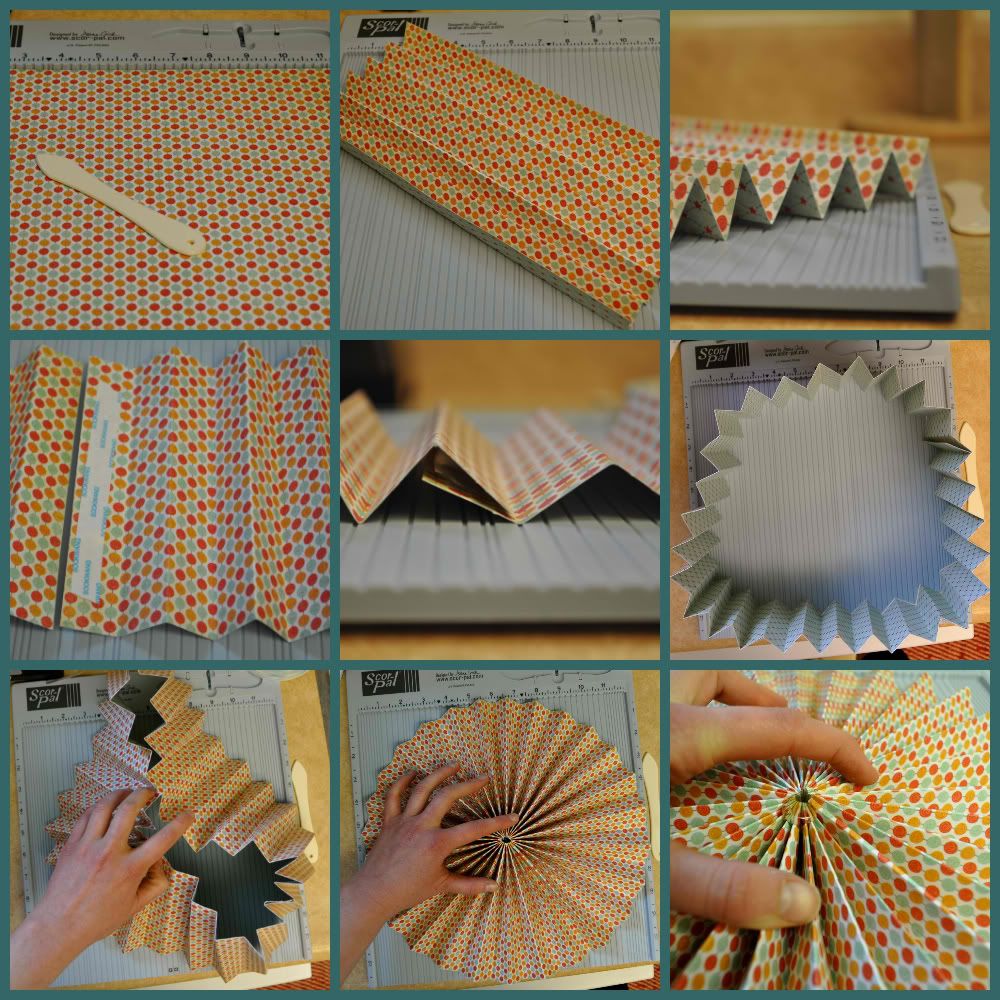
1. I like to scor a complete 12X12 sheet before I cut it into strips. This saves time in scoring. Using your Scor-Pal, scor your paper in 1" intervals alternating front and back side so the folds go back and forth.
2. Cut your paper across the scors at 6"(this will leave you with a 6"X12" strip.
3. Repeat process until you have 5 strips (2.5 sheets of paper).
4. Adhere strips together using strong adhesive (gotta love the scor tape).
5. Adhere two ends together to create a ring.
6. Press ring down so that it fans out.
7. Use hot glue in the center of the fan to adhere it all together.
To the accordions, I added circles and letters. I then hung each piece using the rolled tickets that are available at office stores. To adhere the tickets, I punched a hole in the top of the accordion and tied the tickets on with ribbon.
No comments:
Post a Comment