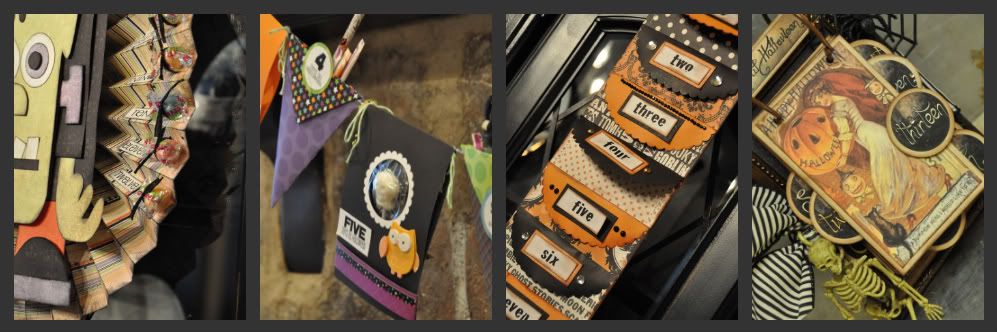
This year, I created 5 different countdowns that are sure to bring the spirit of Halloween straight into your home. I hope you enjoy the patterns and instructions below.
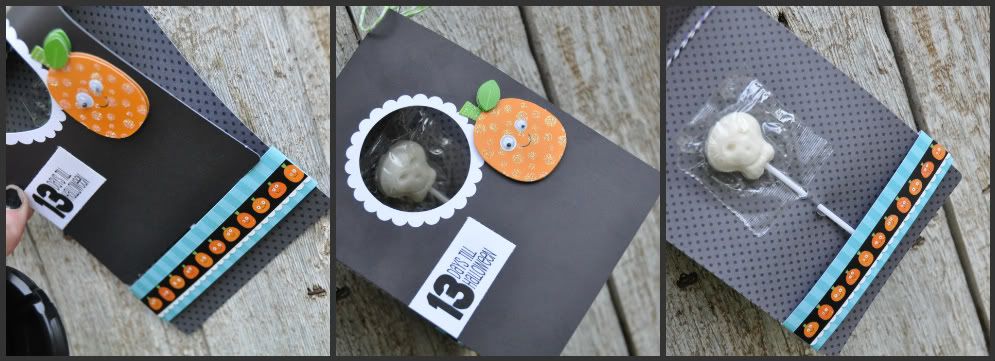
MAD ABOUT ENVELOPES-

I adhered patterned paper to the front of each envelope and then attached envelopes together so that flaps were open and easy to access. To reinforce the adhesive, I sewed along the edges of the envelopes, being careful not to sew the flaps closed. (If you don't have access to a sewing machine, you can add a few staples along the edge). For a fun decorative look, you can sew or staple strips of folded ribbon into the edges as well.
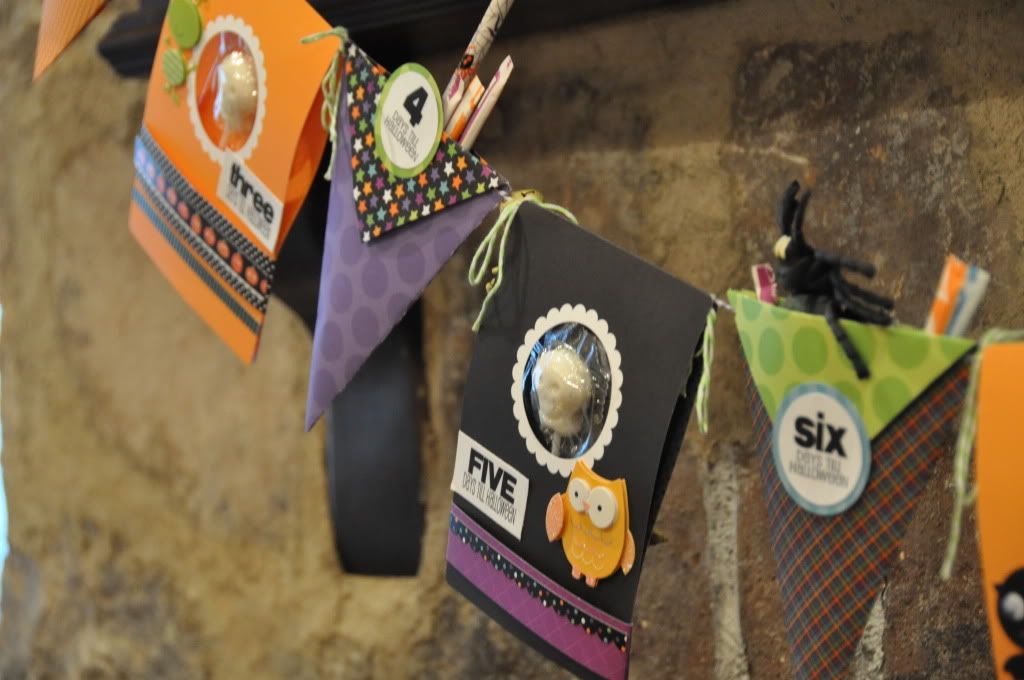
I am obviously loving the Doodlebug Design Halloween line this year. To create this fun banner, I used the scallop circle cards from their card line, patterned paper, twine and lots of lovely coordinating embellishments. I love this line because it is so kid friendly. Lots of cute characters for the kids to enjoy.

To make this banner on your own, you will want to make 6 pennant pockets. You can get 2 pockets out of each piece of 12X12 paper, so you will need three sheets. Download the PAPER PENNANT TEMPLATE here. Cut and fold the pennants and then adhere them together so that you have a pocket to put treats in. Punch a hole in each corner to thread your ribbon or twine through. Add numbers as desired for a countdown. You can download the numbers for all of my projects here.
Alternate cards and pennants to create a fun and colorful banner. Stuff each pennant with treats and goodies for the kids to get to each day.
FRANKIE LOVES CANDY-
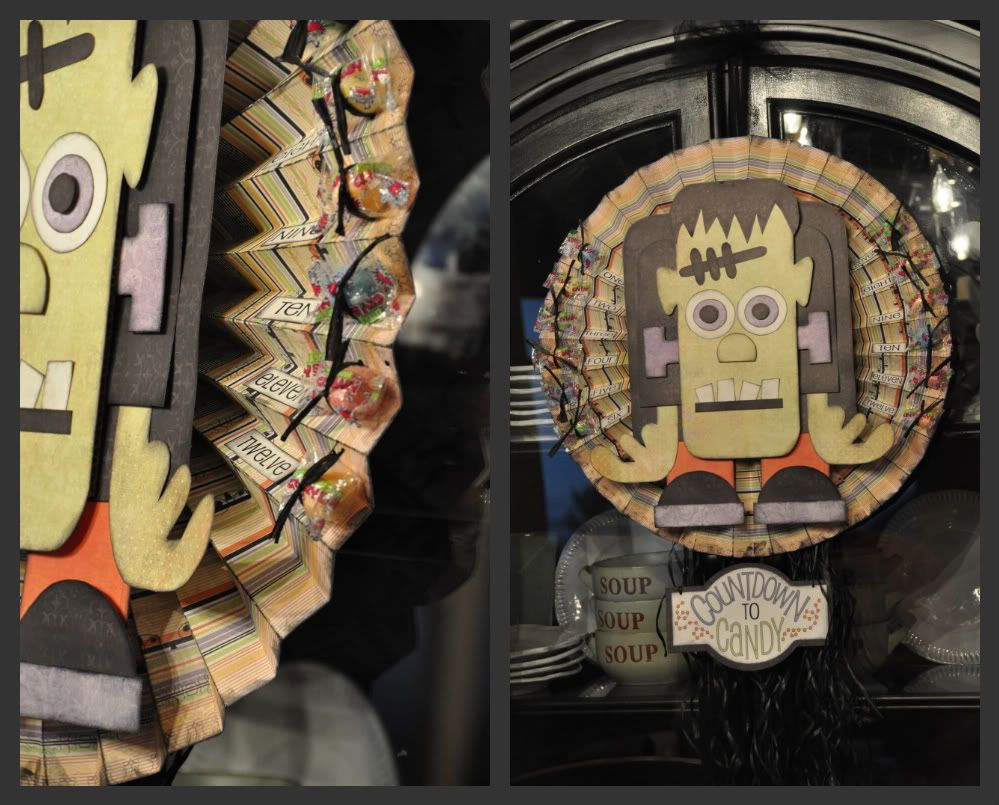
You already know that I am FRANKIE crazy! I switched up my FRANKIE KIT a little to include a countdown to candy! You can still purchase either the kit or pattern only for this fun little monster, but it will now include the numbers and sign to make your kit into a countdown for the same price! Kits will ship out for FREE within 24 hours of purchase!
If you would like to see the tutorial on the accordian circle, visit my circus segment here. (This tutorial also comes in the kit and pattern)
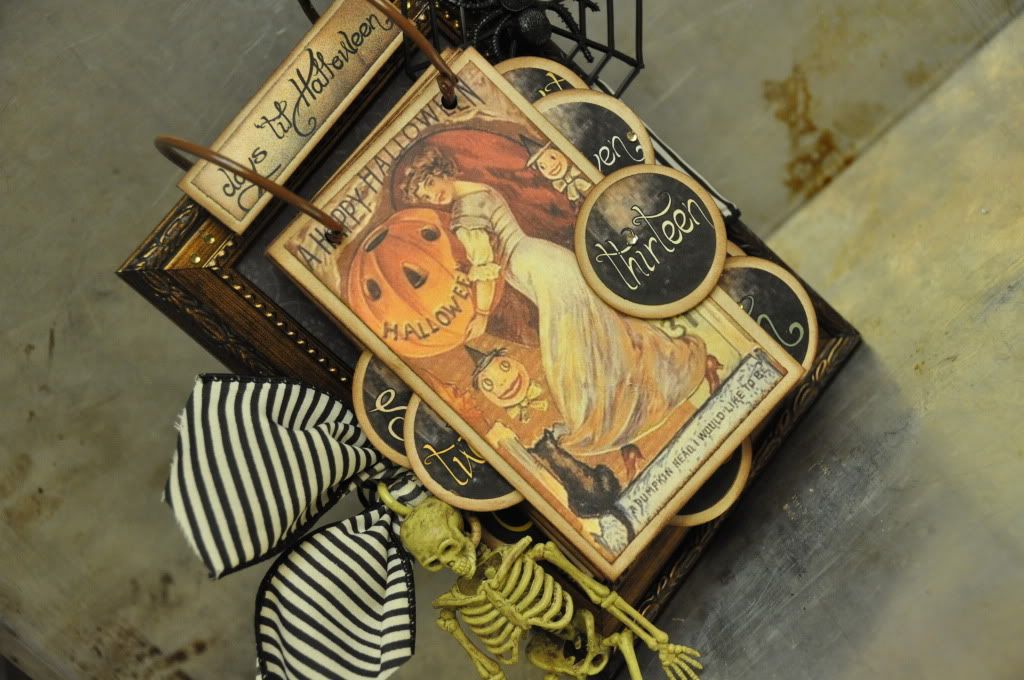
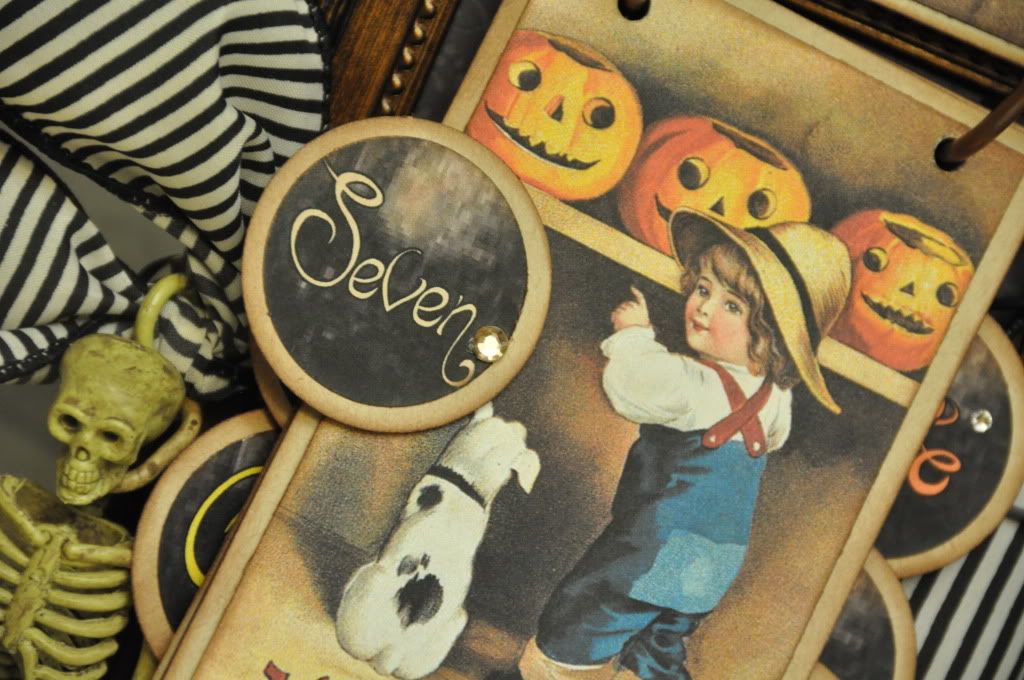
VINTAGE FLIP FRAME-
 I guess I will always be a bit of a vintage junkie! I was inspired with a similar flip frame that I saw on Little Birdie Secrets and of course I had try a version of my own. This countdown is sooooooo easy to make, you can whip it out in just an hour. All you need is a dollar store 4x6 frame, my FREE PRINTABLE DOWNLOAD, two 3" rings, a hole punch (I used my Cropadile) and you are good to go! To view detailed instructions and photos of the process, download the instruction sheet here.

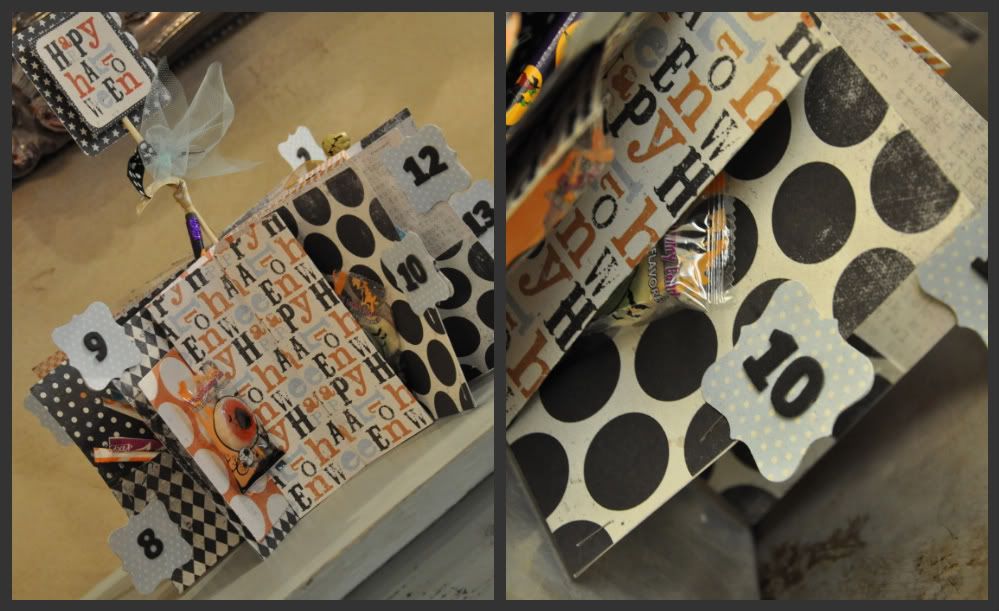
POCKET FULL OF CANDY-
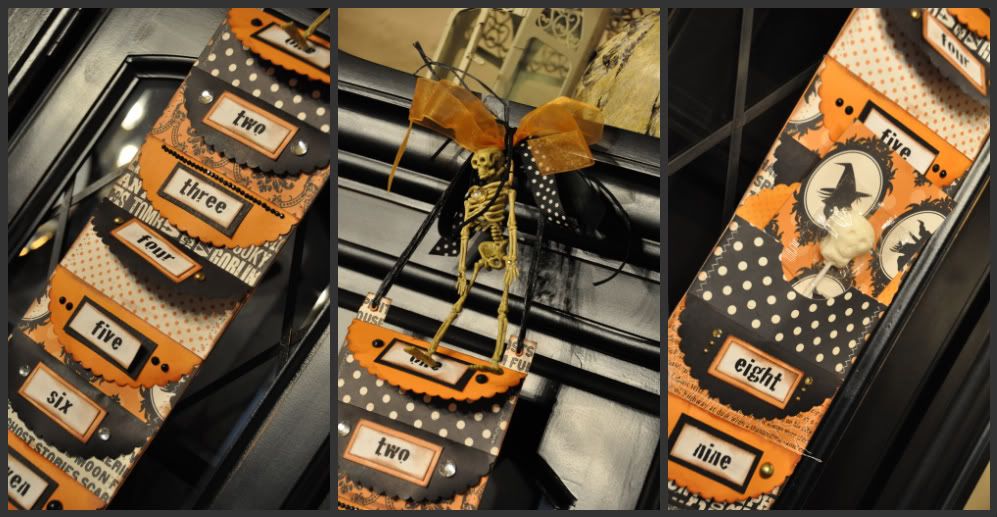
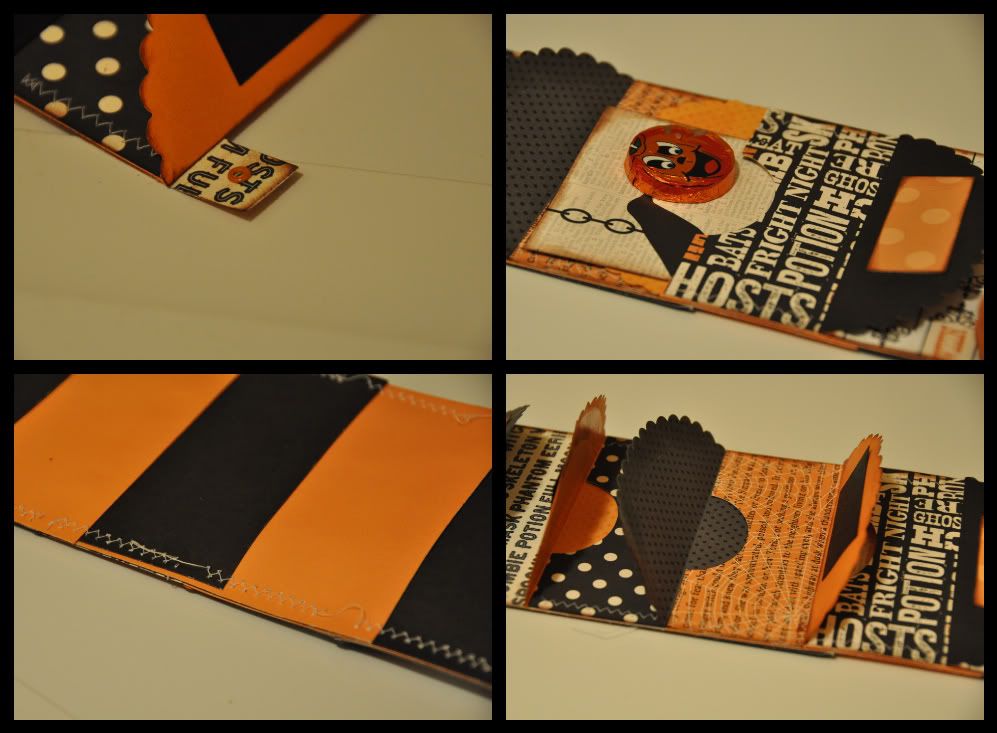
 I created this countdown using the classic Star Book Pattern idea with a little twist. Instead of just making pages, I folded each sheet of paper to create a pocket. Because this project is a little more instruction intense, I will be posting a full tutorial tomorrow at the latest. Sorry for the delay, but I promise, it will be worth the wait!
If you would like to see the tutorial on the accordian circle, visit my circus segment here. (This tutorial also comes in the kit and pattern)
VINTAGE FLIP FRAME-
POCKET FULL OF CANDY-
No comments:
Post a Comment