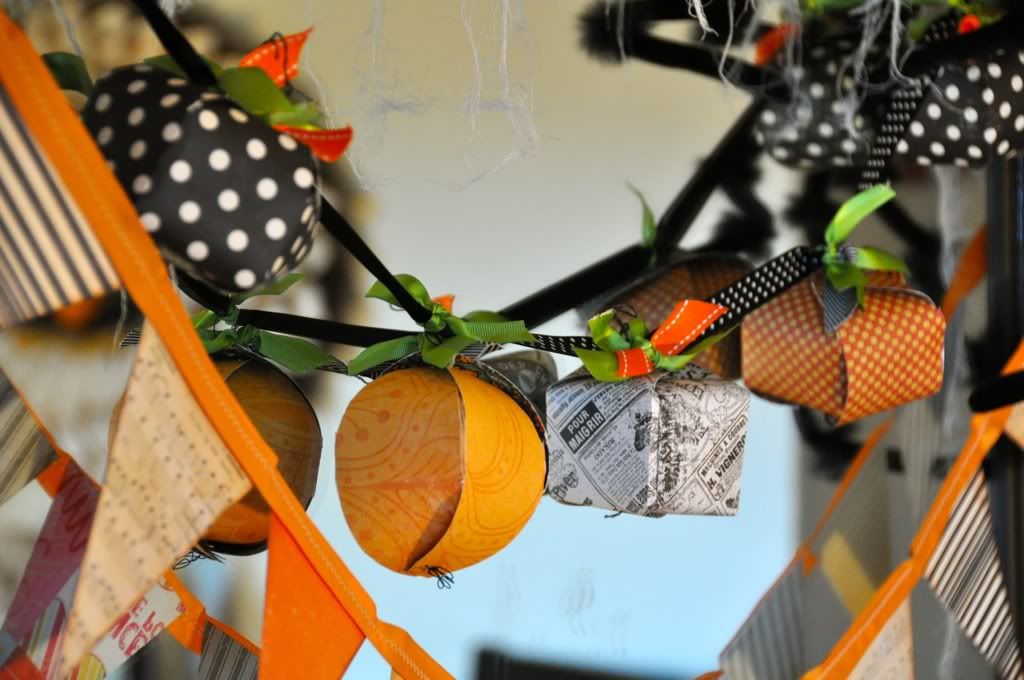
Bitty Favor Pumpkins
1 5X12" strip of pattern paper (use double sided for a cute inside)
Scissors
Hole punch
Wire, ribbon or string
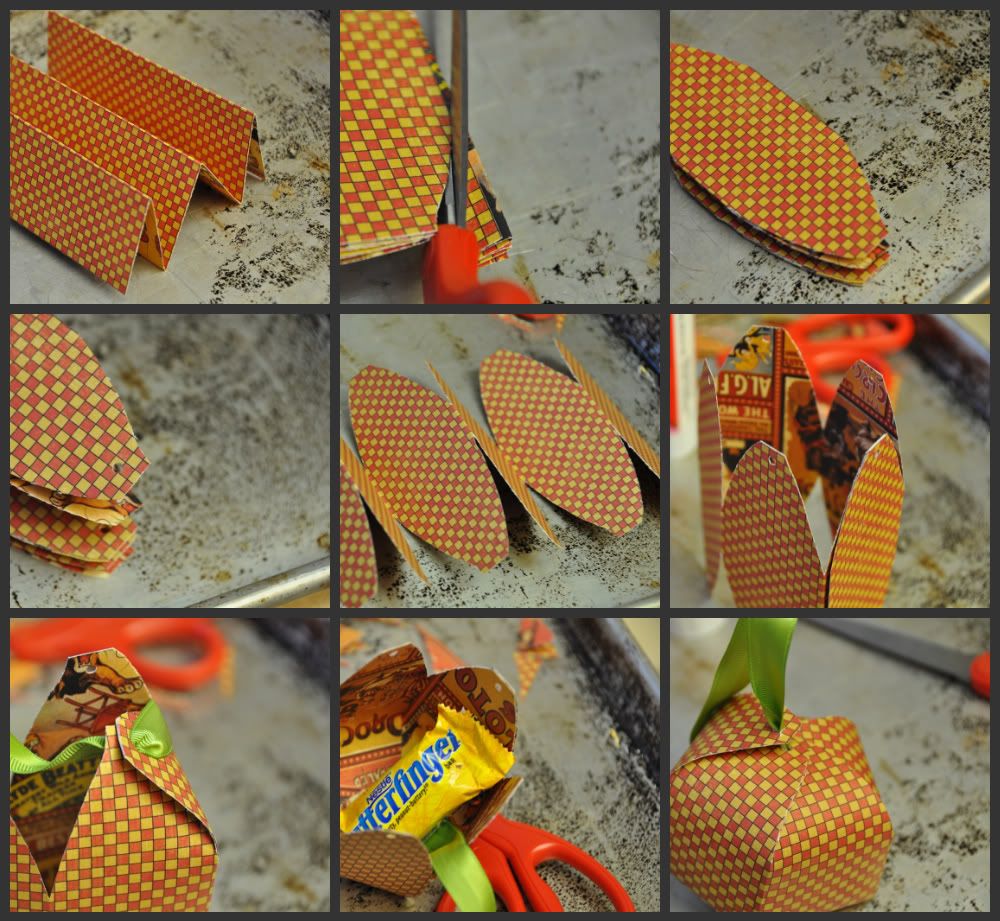
2. Cut each corner off of folded strip. You don't have to be perfect with your cutting, but try to leave about 1' that doesn't get cut.
3. Use a hole punch to punch the top and bottom of the folded strip.
4. Open up strip and adhere the two ends together.
5. Use ribbon, wire, or thread to pull ends in. Thread your desired medium through each hole and pull together.
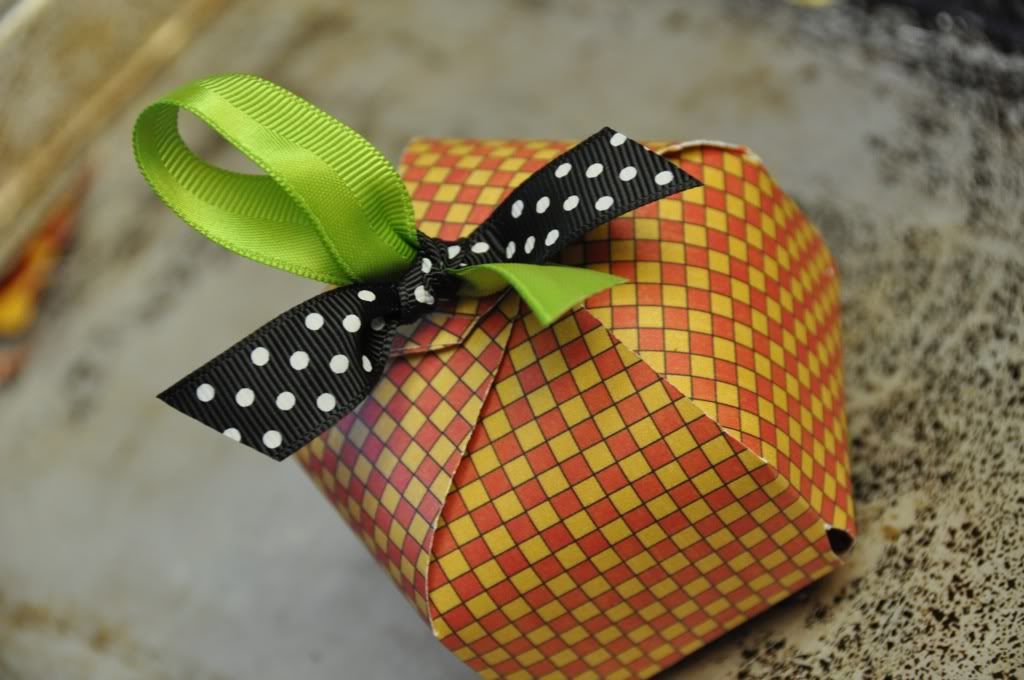
6. If you are using the pumpkins as a favor, add a treat at this time, then thread medium through the center of the pumpkin and out through the top holes and pull tight. Add additional ribbon as desired to create stem.

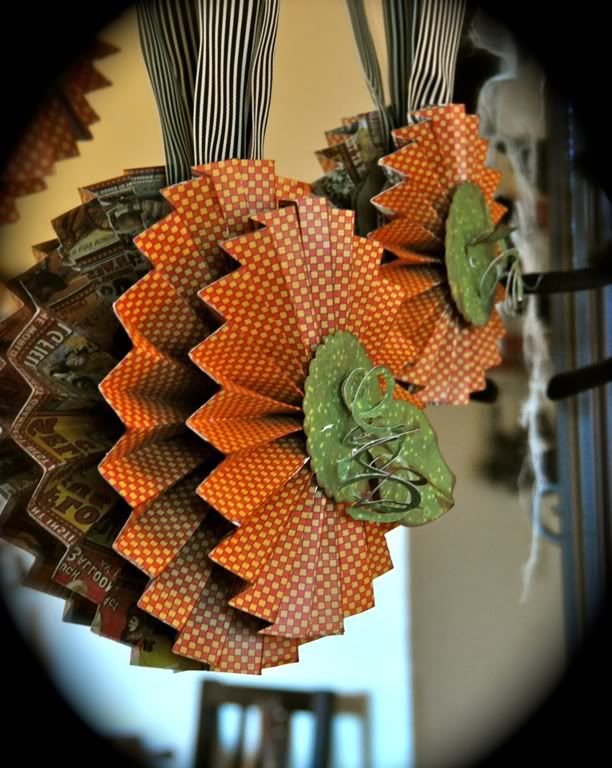
To create the medallion pumpkins, follow the instructions for fan folded medallions. Use different widths of strips to create a variety of medallion sizes. Layer multiple medallions in varying sizes. Add a green stem and circle to the top to finish off the pumpkin look. Tie medallions to thick, festive ribbon and hang from your ceiling, mantle or chandelier.
Fancy Free Centerpiece Pumpkins
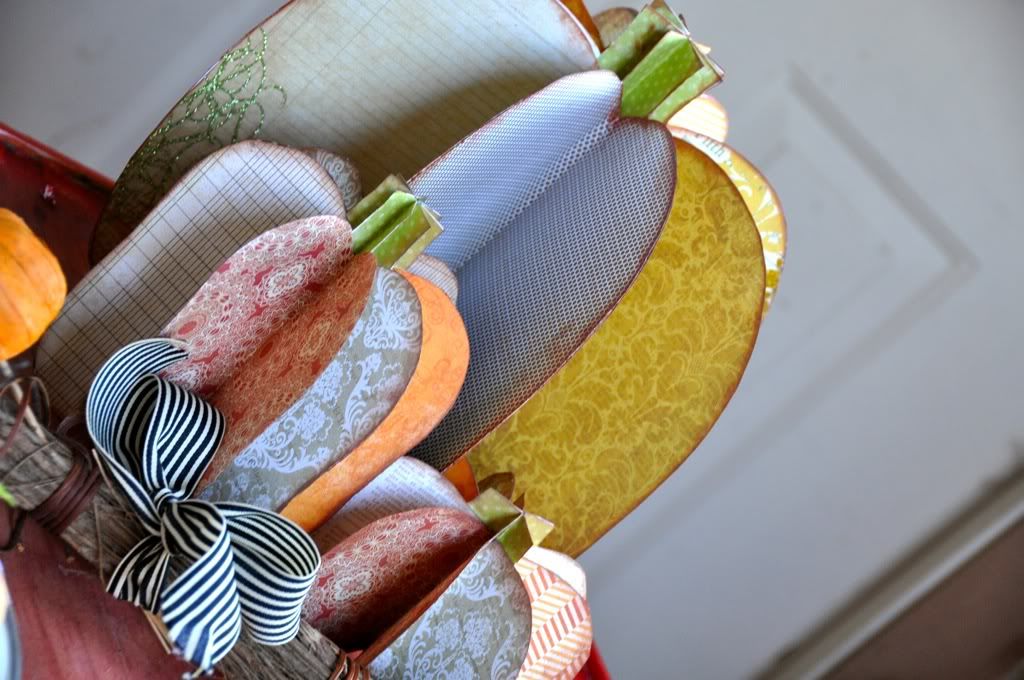
These statement pumpkins are a perfect solution for dressing up a fall or Halloween table. They are a breeze to create in a variety of sizes and shapes. To create these pumpkins you will need:
8 squares of paper-try different sizes to give variety to your tablescape.
Adhesive
Ink
Green paper for the stem
Scissors
Pen or pencil for tracing if desired
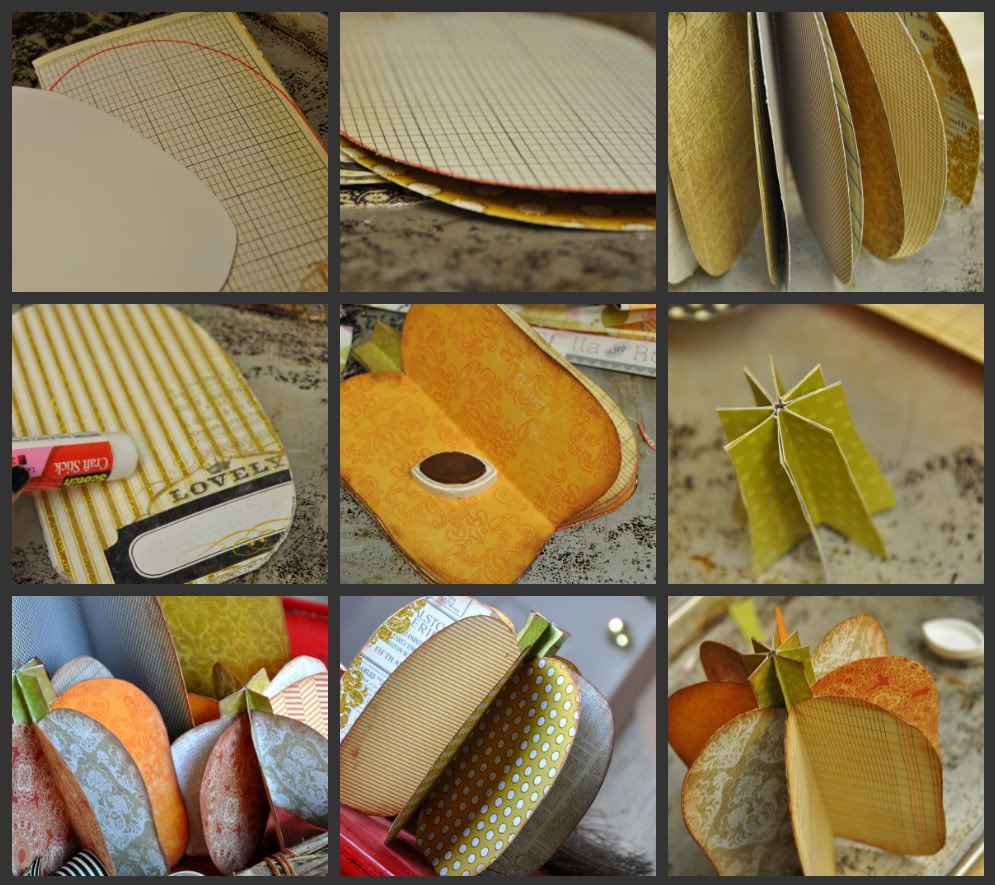
1. Fold your sheets of paper in half and cut a half of a pumpkin pattern. If you are nervous to freehand your pattern, you can use a practice sheet to test it out.
2. Use your first piece to cut each piece in the same pumpkin pattern.
3. Cut stems the same way and adhere them back to back.
4. Adhere folded pumpkins back to back in a stack, tucking stem pieces in as you go.
5. Ink all pieces.
6. Fold pumpkin out and enjoy!
No comments:
Post a Comment