Showing posts with label Fun Links. Show all posts

Sunday, July 10, 2011

Organized Inspiration

Because I am typically running crazy trying to check off my to do list, I was totally inspired by this sweet banner creation.  If you are looking for a fun way to organize your summer, visit http://the-wilson-world.blogspot.com/2010/06/6-days-of-summer-fun-day-three-make.html and check out the amazing instructions for making this project on your own.  How inspiring!

Organized Inspiration

Because I am typically running crazy trying to check off my to do list, I was totally inspired by this sweet banner creation.  If you are looking for a fun way to organize your summer, visit http://the-wilson-world.blogspot.com/2010/06/6-days-of-summer-fun-day-three-make.html and check out the amazing instructions for making this project on your own.  How inspiring!

Wednesday, July 6, 2011

Spinning through SUMMER!

Today, I must admit, I am thinking about anything to keep my mind off of the fact that my air conditioning is still not in working order! My thought process has gone something like this:
Sweat---Heat---Summer---Outside---Bright Colors---Blowing to cool off---Pinwheels!

I think pinwheels are such a fun project for kids old and young alike. They are super easy to make and can really dress up a centerpiece at a summer party.  Check out a few of my favorite online pinwheel finds:
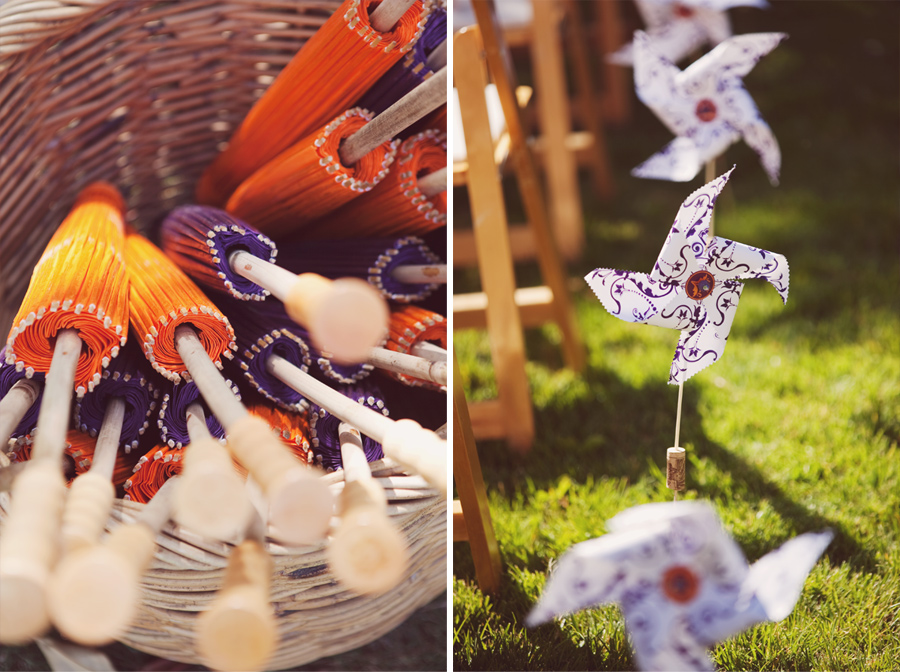
My mind started spinning when I saw the above photo from www.norman-photography.com.  What a fabulous idea for outdoor party decorating. These particular pinwheels were used as favors for a wedding.  How cute would this same idea be for a baby shower or neighborhood BBQ?
I love that this pinwheel was created using two pieces of coordinating paper.  This pinwheel is definitely a step up from your basic square pattern, but it is still very doable.  I found this little sweetie at http://paperexploits.wordpress.com.

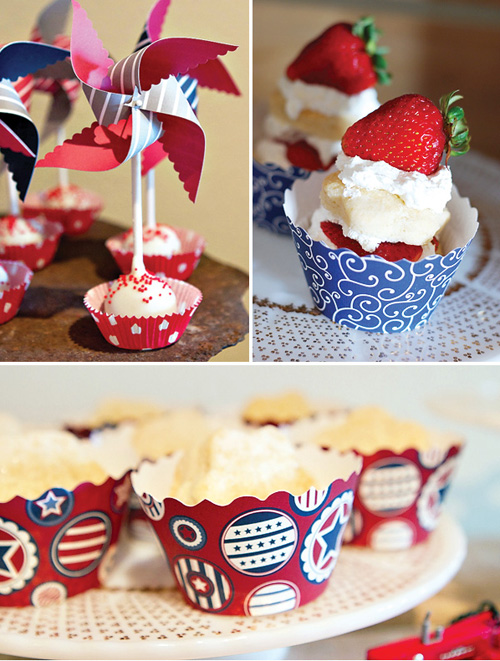
How about a little mini pinwheel for finishing off a fluffy cupcake?  I love the idea of using miniature versions for food decor.  Pinwheels would be great in cakes or even stuck in bowls of popcorn or salad.  This idea came from http://www.pepperdesignblog.com.
I can't think of a happier way to line a path than with a row of cheerful pinwheels.  Lead your guests to your event by sticking handmade pinwheels intermittently along the walkway. Thanks to www.thecheshirekat.com for sharing this fun idea.

Now that we are all feeling inspired to start crafting up pinwheels of our own, here are a few sites that offer downloadable templates.  Remember to get creative with the templates by changing the size and even shape of your cuts.

For a very basic pinwheel:

For amazing instructions on creating a little more advanced pinwheel, visit http://www.heatherbailey.com/Pinwheel.pdf.

Spinning through SUMMER!

Today, I must admit, I am thinking about anything to keep my mind off of the fact that my air conditioning is still not in working order! My thought process has gone something like this:
Sweat---Heat---Summer---Outside---Bright Colors---Blowing to cool off---Pinwheels!

I think pinwheels are such a fun project for kids old and young alike. They are super easy to make and can really dress up a centerpiece at a summer party.  Check out a few of my favorite online pinwheel finds:
My mind started spinning when I saw the above photo from www.norman-photography.com.  What a fabulous idea for outdoor party decorating. These particular pinwheels were used as favors for a wedding.  How cute would this same idea be for a baby shower or neighborhood BBQ?
I love that this pinwheel was created using two pieces of coordinating paper.  This pinwheel is definitely a step up from your basic square pattern, but it is still very doable.  I found this little sweetie at http://paperexploits.wordpress.com.

How about a little mini pinwheel for finishing off a fluffy cupcake?  I love the idea of using miniature versions for food decor.  Pinwheels would be great in cakes or even stuck in bowls of popcorn or salad.  This idea came from http://www.pepperdesignblog.com.
I can't think of a happier way to line a path than with a row of cheerful pinwheels.  Lead your guests to your event by sticking handmade pinwheels intermittently along the walkway. Thanks to www.thecheshirekat.com for sharing this fun idea.

Now that we are all feeling inspired to start crafting up pinwheels of our own, here are a few sites that offer downloadable templates.  Remember to get creative with the templates by changing the size and even shape of your cuts.

For a very basic pinwheel:

For amazing instructions on creating a little more advanced pinwheel, visit http://www.heatherbailey.com/Pinwheel.pdf.

Wednesday, May 18, 2011

Someday when I have walls of my own

First off, you have probably picked up on the incredible lack of posting this week...my apologies. The first week at my new job has been fabulous so far, but it is definitely an adjustment to get back to working full time.  Despite the 10 hours of each day that have suddenly vanished, I am loving all of the new things I am learning and it's going to be great!

Second, I wanted to share this unique idea that I saw online today. I am always dreaming about fun things that I want to do when I finally have a place of my own.  This idea makes changing up your decorating so easy.  Yes, that is chicken wire on the wall.  Crazy, huh?  I love it.
 You can check out more fabulous pictures as well as get the amazing instructions for creating this look in your own home at Under The Sycamore.

Someday when I have walls of my own

First off, you have probably picked up on the incredible lack of posting this week...my apologies. The first week at my new job has been fabulous so far, but it is definitely an adjustment to get back to working full time.  Despite the 10 hours of each day that have suddenly vanished, I am loving all of the new things I am learning and it's going to be great!

Second, I wanted to share this unique idea that I saw online today. I am always dreaming about fun things that I want to do when I finally have a place of my own.  This idea makes changing up your decorating so easy.  Yes, that is chicken wire on the wall.  Crazy, huh?  I love it.
 You can check out more fabulous pictures as well as get the amazing instructions for creating this look in your own home at Under The Sycamore.

Monday, May 2, 2011

Outdoor Party Decor on Studio 5


The weather is finally warming up (fingers crossed)...and that means it is time for outdoor gatherings to commence!  Today on Studio 5, I showed some fun ideas for sprucing up your outdoor bash.  These ideas can be used for weddings, showers, BBQ's, luaus-the list goes on and on.

All of the projects in the segment were created using the 2011 collections from Fancy Pants Designs. I love the "Beach Bum" and "Beach Babe" lines for water parties and luaus and the "It's the Little Things" collection is fabulous for weddings and showers.

Hanging Party Vines-30 minutes per vine $5 per vine
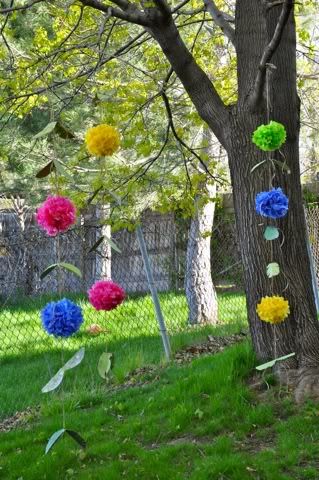
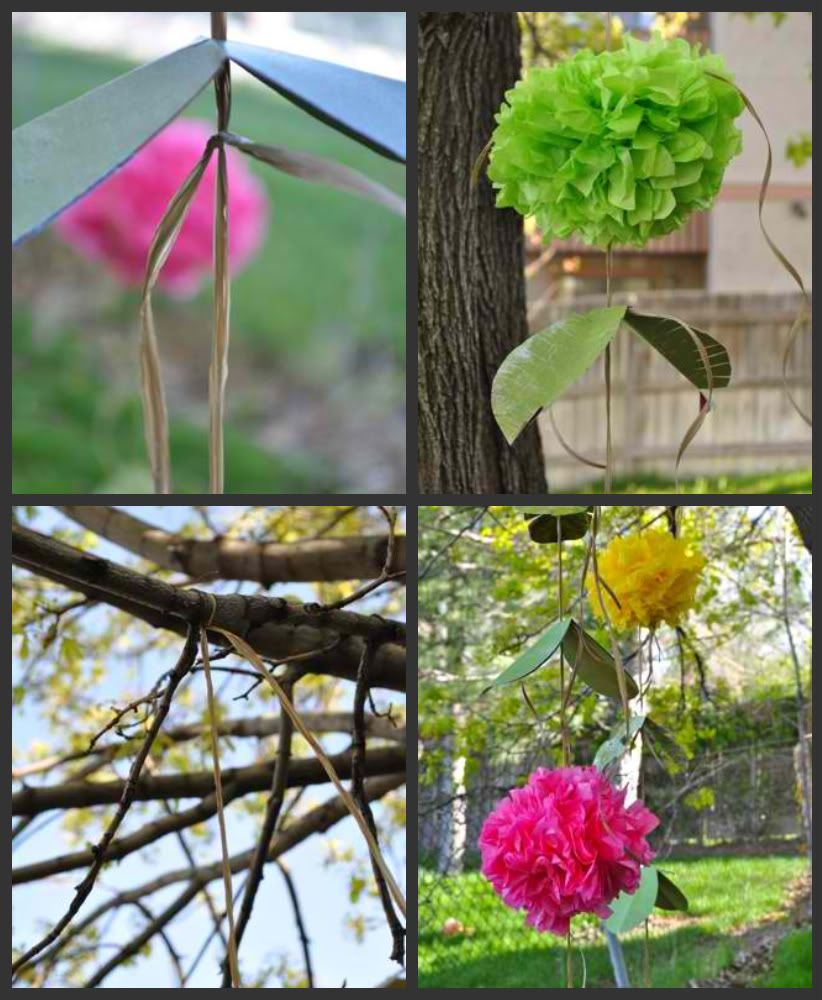
What a great way to add pop and color to a big outdoor space.  These vines can be hung from trees, balconies or gazebos. The inspiration for these vines came from the fabulous Once Wed website.  This fun site has loads of ideas for decorating large spaces for parties and events.  I chose to make up my vines in bright summer colors that would be great at a Luau or water themed party.  For a more formal affair, try making them out of plain white tissue with black and white patterned leaves. They are very simple to make and they are also great for tight budgets.  Click HERE for a step by step tutorial on these vines.


Paper Party Lanterns- 5 minutes and $1 per lantern plus the cost of lights

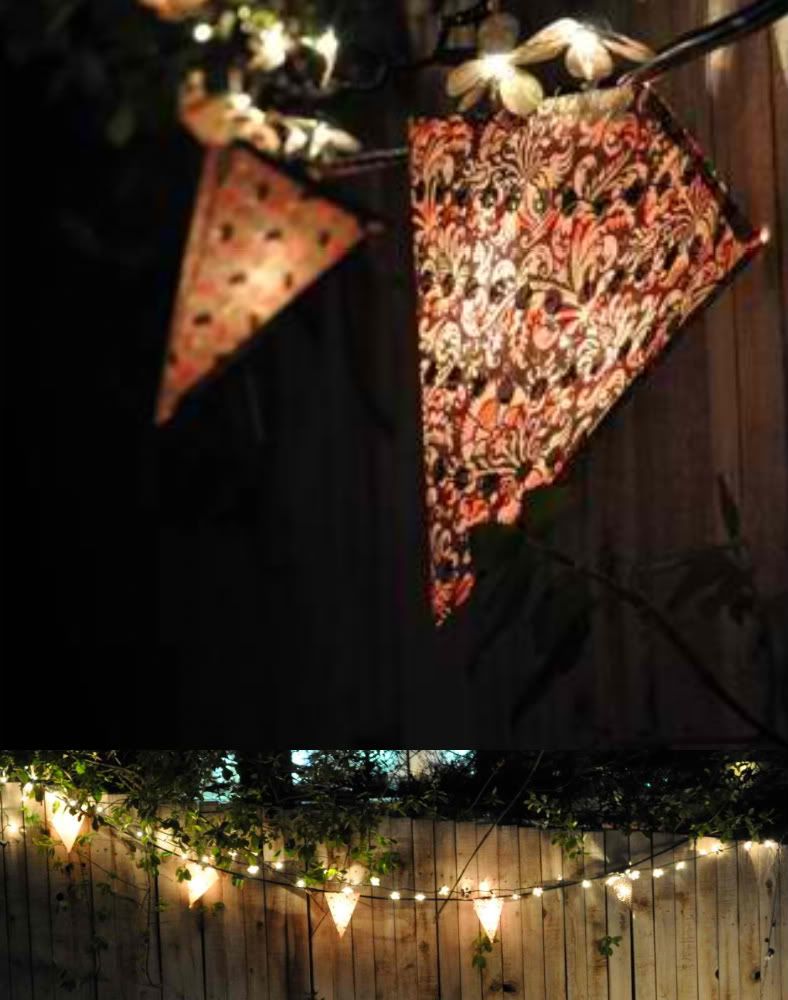
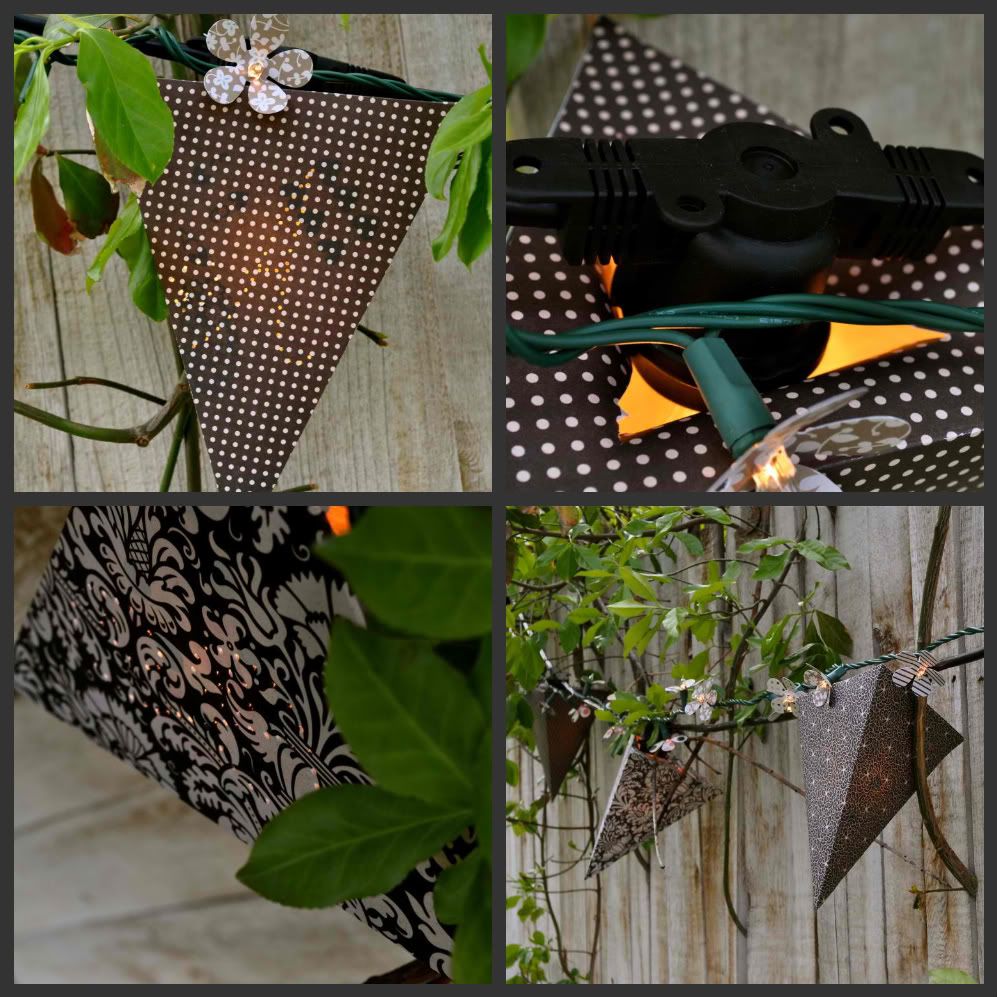
Lighting is such a powerful statement in decorating.  I love the idea of having these custom paper lanterns hanging around a garden reception.  Whether you hang them on a fence, in trees, off of a gazebo, or just along a railing, they are sure to catch the eye of your guests.

Once again, the inspiration and instructions for these lanterns can be found at Once Wed. The template provided at Once Wed calls for 14X14 paper.  Because I wanted to use the beautiful patterned paper from Fancy Pants, I reduced the pattern to fit on a 12X12. You can do this at any copy shop. 

I searched high and low for a high impact strand of lights to make this garland.  I ended up finding a great source for all sorts of custom strands.  Duncan Lighting in Bountiful was amazing to work with. They can create any length of cord for you. They also rent out the more industrial hanging lights for events!
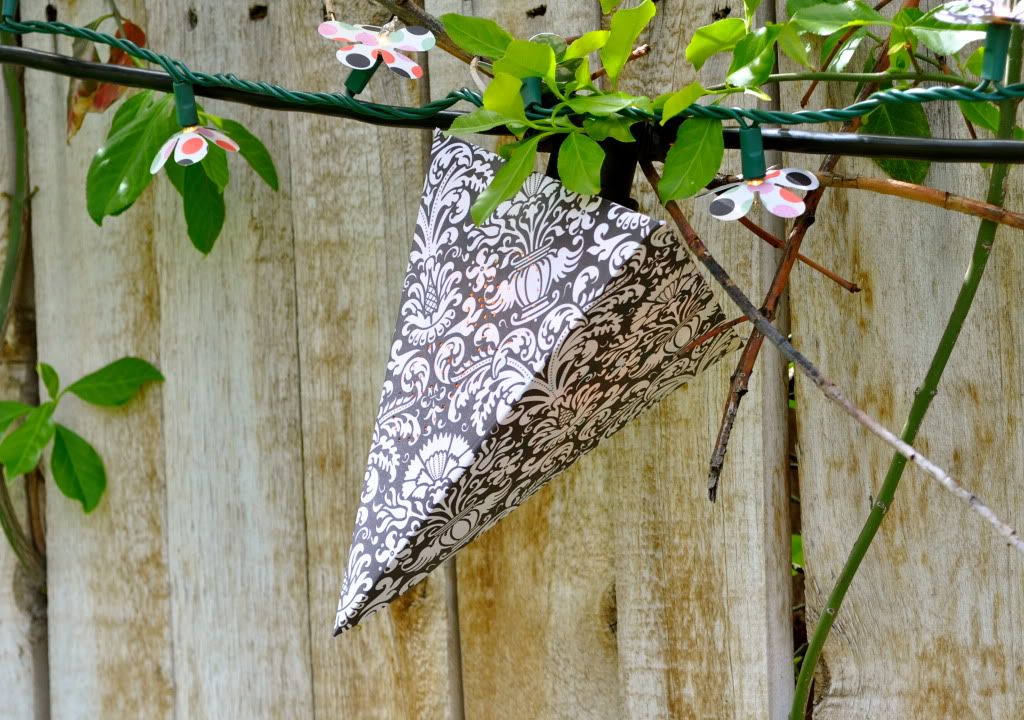
Blooming Flower Christmas Lights- Quick and super inexpensive
In order to add a little pizzaz to my hanging light garland, I dressed up a strand of regular old christmas lights to hang along side it.  To make the blooming vine, I just punched paper flowers using my favorite retro flower punch and stuck them onto each bulb.  I dab of hot glue secured the flowers in place.  So cute and so simple!

Transparency Luminaries- $1-$2 each-3 minutes each


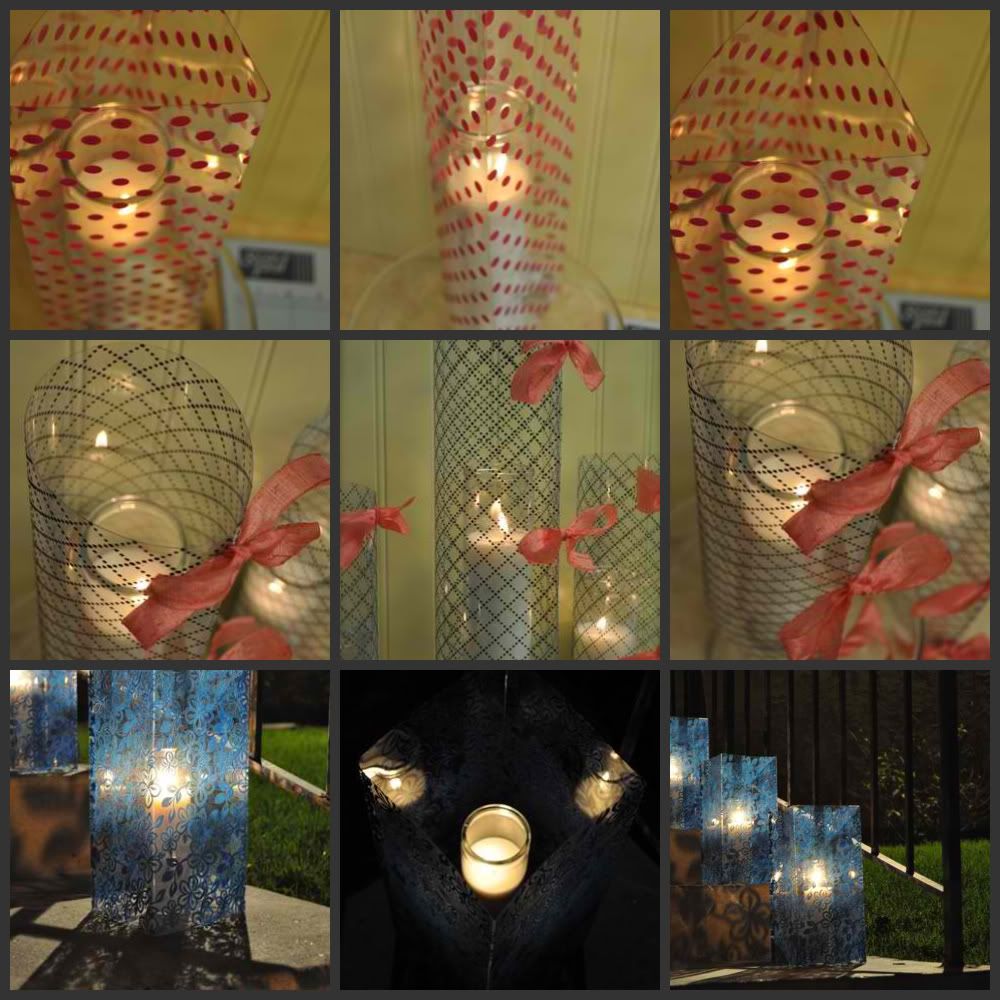
These fun luminaries make a great centerpiece. They also look fabulous along a path or stairway leading to your event.  I loved using the different printed transparencies from Fancy Pants to create a dramatic candlelit effect.

I made several different styles of luminaries out of the different patterns of transparency. Get creative with folding and bending to create different looks. You can also trim the transparencies for shorter candles.

For the cylinder holders: punch three holes in two sides of each transparency.  Roll up transparency so that holes match up and tie closed with ribbon.

For the square holders: scor two sheets of transparency at 5 3/4 and 11 1/2.  Use scor tape or clear adhesive to fit square pieces together.

For Triangle holders: scor one sheet of transparency at 3 3/4, 7 1/2, and 11 1/2. Fold and secure using scor tape.

Outdoor Party Decor on Studio 5


The weather is finally warming up (fingers crossed)...and that means it is time for outdoor gatherings to commence!  Today on Studio 5, I showed some fun ideas for sprucing up your outdoor bash.  These ideas can be used for weddings, showers, BBQ's, luaus-the list goes on and on.

All of the projects in the segment were created using the 2011 collections from Fancy Pants Designs. I love the "Beach Bum" and "Beach Babe" lines for water parties and luaus and the "It's the Little Things" collection is fabulous for weddings and showers.

Hanging Party Vines-30 minutes per vine $5 per vine
What a great way to add pop and color to a big outdoor space.  These vines can be hung from trees, balconies or gazebos. The inspiration for these vines came from the fabulous Once Wed website.  This fun site has loads of ideas for decorating large spaces for parties and events.  I chose to make up my vines in bright summer colors that would be great at a Luau or water themed party.  For a more formal affair, try making them out of plain white tissue with black and white patterned leaves. They are very simple to make and they are also great for tight budgets.  Click HERE for a step by step tutorial on these vines.


Paper Party Lanterns- 5 minutes and $1 per lantern plus the cost of lights

Lighting is such a powerful statement in decorating.  I love the idea of having these custom paper lanterns hanging around a garden reception.  Whether you hang them on a fence, in trees, off of a gazebo, or just along a railing, they are sure to catch the eye of your guests.

Once again, the inspiration and instructions for these lanterns can be found at Once Wed. The template provided at Once Wed calls for 14X14 paper.  Because I wanted to use the beautiful patterned paper from Fancy Pants, I reduced the pattern to fit on a 12X12. You can do this at any copy shop. 

I searched high and low for a high impact strand of lights to make this garland.  I ended up finding a great source for all sorts of custom strands.  Duncan Lighting in Bountiful was amazing to work with. They can create any length of cord for you. They also rent out the more industrial hanging lights for events!
Blooming Flower Christmas Lights- Quick and super inexpensive
In order to add a little pizzaz to my hanging light garland, I dressed up a strand of regular old christmas lights to hang along side it.  To make the blooming vine, I just punched paper flowers using my favorite retro flower punch and stuck them onto each bulb.  I dab of hot glue secured the flowers in place.  So cute and so simple!

Transparency Luminaries- $1-$2 each-3 minutes each


These fun luminaries make a great centerpiece. They also look fabulous along a path or stairway leading to your event.  I loved using the different printed transparencies from Fancy Pants to create a dramatic candlelit effect.

I made several different styles of luminaries out of the different patterns of transparency. Get creative with folding and bending to create different looks. You can also trim the transparencies for shorter candles.

For the cylinder holders: punch three holes in two sides of each transparency.  Roll up transparency so that holes match up and tie closed with ribbon.

For the square holders: scor two sheets of transparency at 5 3/4 and 11 1/2.  Use scor tape or clear adhesive to fit square pieces together.

For Triangle holders: scor one sheet of transparency at 3 3/4, 7 1/2, and 11 1/2. Fold and secure using scor tape.

Friday, April 22, 2011

The Circus Comes to Town!-Part 2

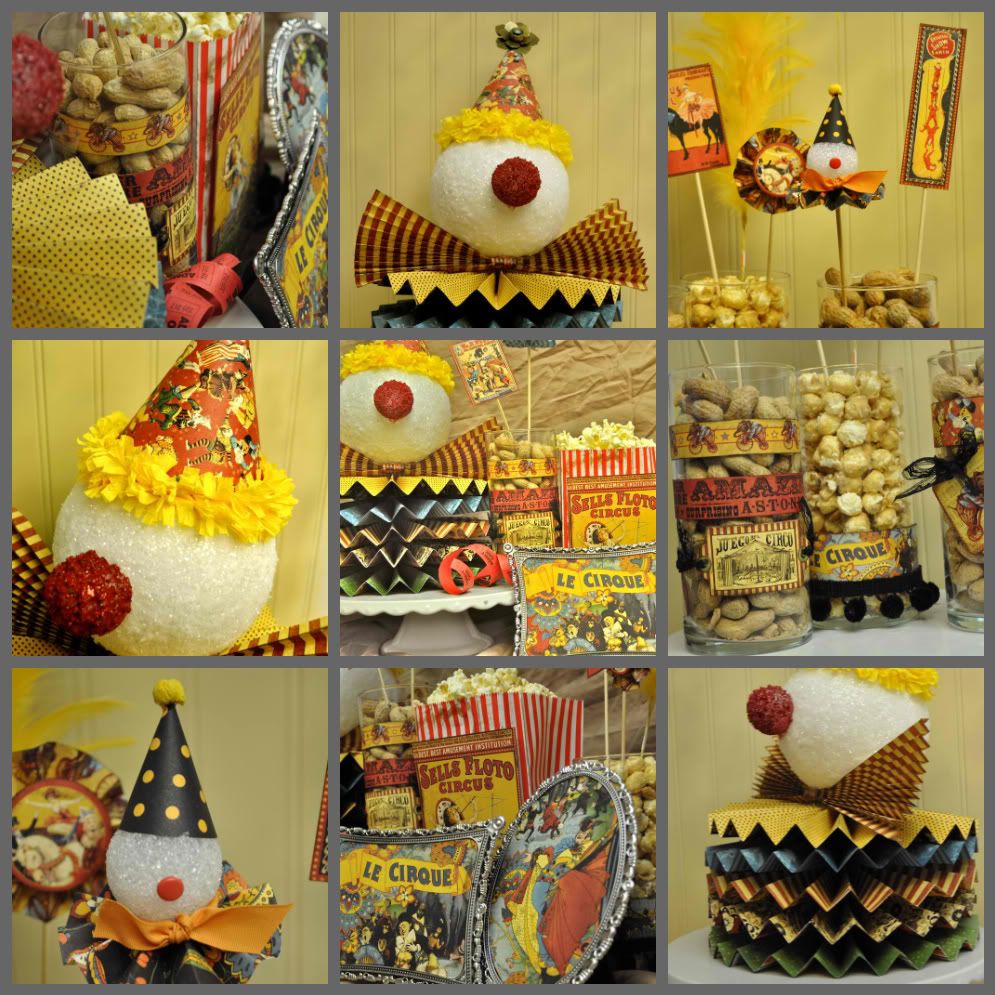
When I first spotted the Le Cirque line from Graphic 45, I went weak in the knees! (You know I am a sucker for anything vintage) I love the idea of celebrating an adult venue vintage circus style.  There are so many fabulous ways to decorate using theme. To create these pieces, I used many of the same techniques found in the Animal Circus party.  By switching out the paper, I got a totally different look.
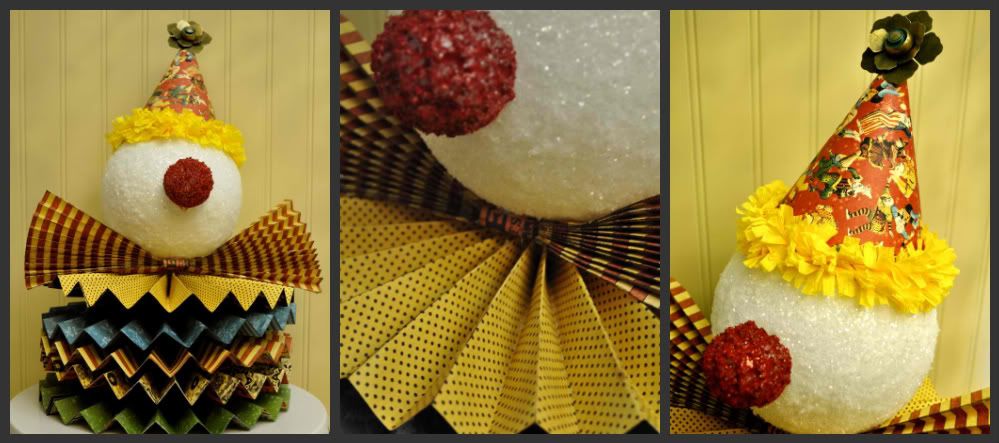
Send in the clowns! I know that many of us have mixed emotions when it comes to clowns, but regardless of your pre-conceived notions about these cheerful fellows....you gotta love this centerpiece.  I have to say, it is probably one of my favorite creations to date!
To create this piece:
1. Make 5 accordion folded circles (see tutorial in part 1).  I made the circles from 5" strips and used 4 strips for each circle.  After the circles were created, I hot glued them together with a skewer down the center.
2. Paint Styrofoam ball with craft glue and apply crystal glitter to add shimmer.
3. Attach head to skewer and secure with hot glue.
4. Paint a smaller styrofoam ball red. Cut off the base (level for better adhering) and hot glue it to the clown face.
5. Make a matching hat (tutorial in part 1) and secure it to the clowns head using hot glue.
6. Make a bow tie by accordion folding one 12X12 paper in 1/2" folds.  Wrap a coordinating piece of paper around the center of the accordion and adhere.
7. Tuck bow tie under clown head.

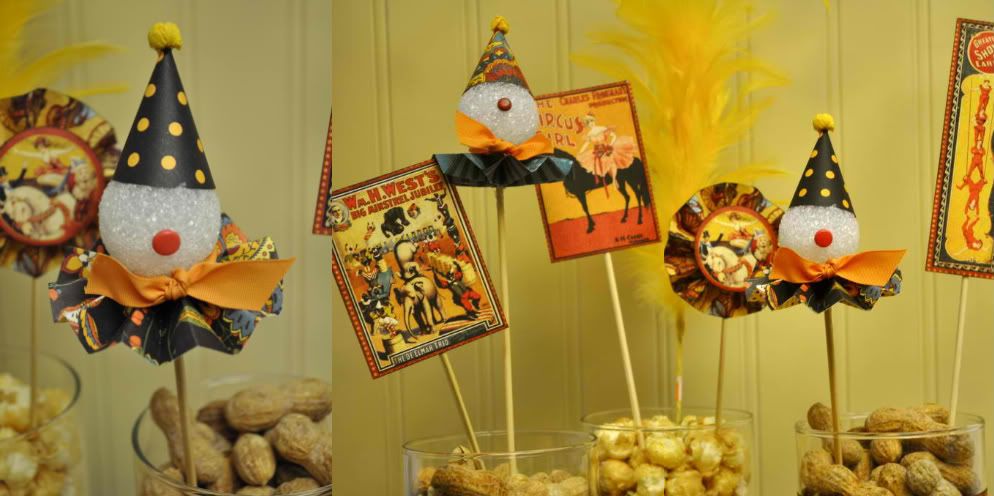
I used a similar process to create the baby clown picks for the treat jars. For the baby clowns, I created an accordion circle from a 1.25" strip of 12X12 paper folded in 1/4" intervals. The rest of the picks the were so quick and easy. I just cut apart one of the pages and adhered each picture to a skewer. For dramatic effect, I threw in a bright feather plume. Simple, inexpensive and yet,  show stopping!

The Circus Comes to Town!-Part 2

When I first spotted the Le Cirque line from Graphic 45, I went weak in the knees! (You know I am a sucker for anything vintage) I love the idea of celebrating an adult venue vintage circus style.  There are so many fabulous ways to decorate using theme. To create these pieces, I used many of the same techniques found in the Animal Circus party.  By switching out the paper, I got a totally different look.
Send in the clowns! I know that many of us have mixed emotions when it comes to clowns, but regardless of your pre-conceived notions about these cheerful fellows....you gotta love this centerpiece.  I have to say, it is probably one of my favorite creations to date!
To create this piece:
1. Make 5 accordion folded circles (see tutorial in part 1).  I made the circles from 5" strips and used 4 strips for each circle.  After the circles were created, I hot glued them together with a skewer down the center.
2. Paint Styrofoam ball with craft glue and apply crystal glitter to add shimmer.
3. Attach head to skewer and secure with hot glue.
4. Paint a smaller styrofoam ball red. Cut off the base (level for better adhering) and hot glue it to the clown face.
5. Make a matching hat (tutorial in part 1) and secure it to the clowns head using hot glue.
6. Make a bow tie by accordion folding one 12X12 paper in 1/2" folds.  Wrap a coordinating piece of paper around the center of the accordion and adhere.
7. Tuck bow tie under clown head.

I used a similar process to create the baby clown picks for the treat jars. For the baby clowns, I created an accordion circle from a 1.25" strip of 12X12 paper folded in 1/4" intervals. The rest of the picks the were so quick and easy. I just cut apart one of the pages and adhered each picture to a skewer. For dramatic effect, I threw in a bright feather plume. Simple, inexpensive and yet,  show stopping!

Tuesday, April 19, 2011

Printable Easter Place Cards

If you are hosting Easter dinner and haven't come up with your place cards yet, this is the perfect post for you. All of these place cards can be downloaded, printed and cut out in a breeze!
You can get the FREE PRINTABLE for these show stopping place holders at http://blog.tracyporter.com.  They are so easy to print and put together.  I love this kind of project!  Lots of bang for little effort and expense.

This little chick is adorable if you are hosting more of a casual event.  You can actually customize them with your names right on the computer.
You can find the download at http://imsewverycreative.blogspot.com/ 

Printable Easter Place Cards

If you are hosting Easter dinner and haven't come up with your place cards yet, this is the perfect post for you. All of these place cards can be downloaded, printed and cut out in a breeze!
You can get the FREE PRINTABLE for these show stopping place holders at http://blog.tracyporter.com.  They are so easy to print and put together.  I love this kind of project!  Lots of bang for little effort and expense.

This little chick is adorable if you are hosting more of a casual event.  You can actually customize them with your names right on the computer.
You can find the download at http://imsewverycreative.blogspot.com/ 

Thursday, April 14, 2011

The Incredible, Edible, and Colorful Egg

I am so happy to have Easter on the horizon.  I always enjoy the traditional holiday activities, and for Easter, that means creating colorful eggs!  This year, I am determined to try out some different techniques for decorating eggs.  Here are a few bits of inspiration I found while researching. I can't wait to try  a few of them out for my table.
I think these eggs are my new favorite.  I love the look of spiraled colors. These eggs were made using rubber bands.  For the how to visit http://sandytoesandpopsicles.blogspot.com/2010/04/egg-dying-techniques-part-1.html. She has so many fun Easter ideas to check out.  Be sure to see her adorable FREE printables. There are some especially cute egg wrappers. You will love her site.  Here is another egg technique that she shared.

I think these eggs are so unique.  I love that it brings the color into the edible egg instead of just the shell.
I have been wanting to try dyeing eggs with old ties for a few years now.  It is actually a fairly simple technique that can be used to get great imagery on the classic egg.  You can find a great video tutorial for this method at

The Incredible, Edible, and Colorful Egg

I am so happy to have Easter on the horizon.  I always enjoy the traditional holiday activities, and for Easter, that means creating colorful eggs!  This year, I am determined to try out some different techniques for decorating eggs.  Here are a few bits of inspiration I found while researching. I can't wait to try  a few of them out for my table.
I think these eggs are my new favorite.  I love the look of spiraled colors. These eggs were made using rubber bands.  For the how to visit http://sandytoesandpopsicles.blogspot.com/2010/04/egg-dying-techniques-part-1.html. She has so many fun Easter ideas to check out.  Be sure to see her adorable FREE printables. There are some especially cute egg wrappers. You will love her site.  Here is another egg technique that she shared.

I think these eggs are so unique.  I love that it brings the color into the edible egg instead of just the shell.
I have been wanting to try dyeing eggs with old ties for a few years now.  It is actually a fairly simple technique that can be used to get great imagery on the classic egg.  You can find a great video tutorial for this method at

Thursday, March 31, 2011

A Silly April Fools

April Fools Day is the perfect time to summon your inner jokester! With the prank filled day coming up tomorrow, I thought I would share some fun ideas for creating lots of silly laughs with your friends and family. The trick with April Fools is finding fun little jokes that don't make a big mess!  These are some clean and simple ideas I found around the web. Enjoy!
These fake stuffed potatoes make a fun side dish for your dinner meal. They are also for kids to play chef with after the prank is complete. To see the easy instructions for making these spuds visit http://familyfun.go.com/april-fools-day/april-fools-day-craft-pranks/faked-potato-673908/
 
How easy is this funny little prank? Just grab a pair of your hubby's pants and shoes and you are set to create a "Fake Daddy Joke".  For detailed instructions visit: http://familyfun.go.com/april-fools-day/april-fools-day-craft-pranks/model-parent-665896/ 

The following ideas came from the Martha Stewart website.  
Make solid milk with just a little gelatin.
Create a telephone disaster by taping down the receiver button-for those of you who still have a "REAL PHONE"
Rearrange a spouse or older child's drawers.

*APRIL FOOLS WARNING: Remember....What goes around, comes around.  Keep your eyes open for silly little jokes that others will be playing on you too!


A Silly April Fools

April Fools Day is the perfect time to summon your inner jokester! With the prank filled day coming up tomorrow, I thought I would share some fun ideas for creating lots of silly laughs with your friends and family. The trick with April Fools is finding fun little jokes that don't make a big mess!  These are some clean and simple ideas I found around the web. Enjoy!
These fake stuffed potatoes make a fun side dish for your dinner meal. They are also for kids to play chef with after the prank is complete. To see the easy instructions for making these spuds visit http://familyfun.go.com/april-fools-day/april-fools-day-craft-pranks/faked-potato-673908/
 
How easy is this funny little prank? Just grab a pair of your hubby's pants and shoes and you are set to create a "Fake Daddy Joke".  For detailed instructions visit: http://familyfun.go.com/april-fools-day/april-fools-day-craft-pranks/model-parent-665896/ 

The following ideas came from the Martha Stewart website.  
Make solid milk with just a little gelatin.
Create a telephone disaster by taping down the receiver button-for those of you who still have a "REAL PHONE"
Rearrange a spouse or older child's drawers.

*APRIL FOOLS WARNING: Remember....What goes around, comes around.  Keep your eyes open for silly little jokes that others will be playing on you too!