Quantity Over Quality- Take a page from Anthropology’s book of decorating: If you have a large space to decorate, aim for simple, quick banners that can be put together without a lot of effort. By combining multiple strands of simple banners, you can create a big WOW factor in your space.
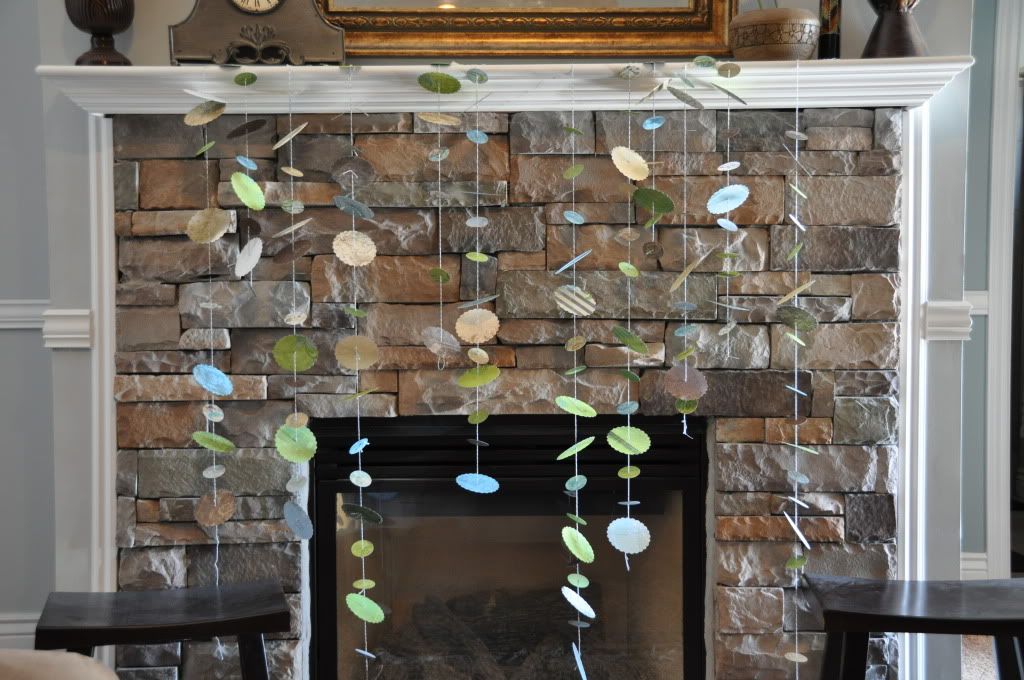
To create this mantle decor, punch various sizes of circles from double sided paper (I used Bo Bunny’s “Welcome Home” collection). Using a thick needle threaded with bakers twine, thread each circle onto the string. To secure each circle in the desired spot, tie a slip knot in the thread between circles. Mix up your paper and sizing to give a random look.
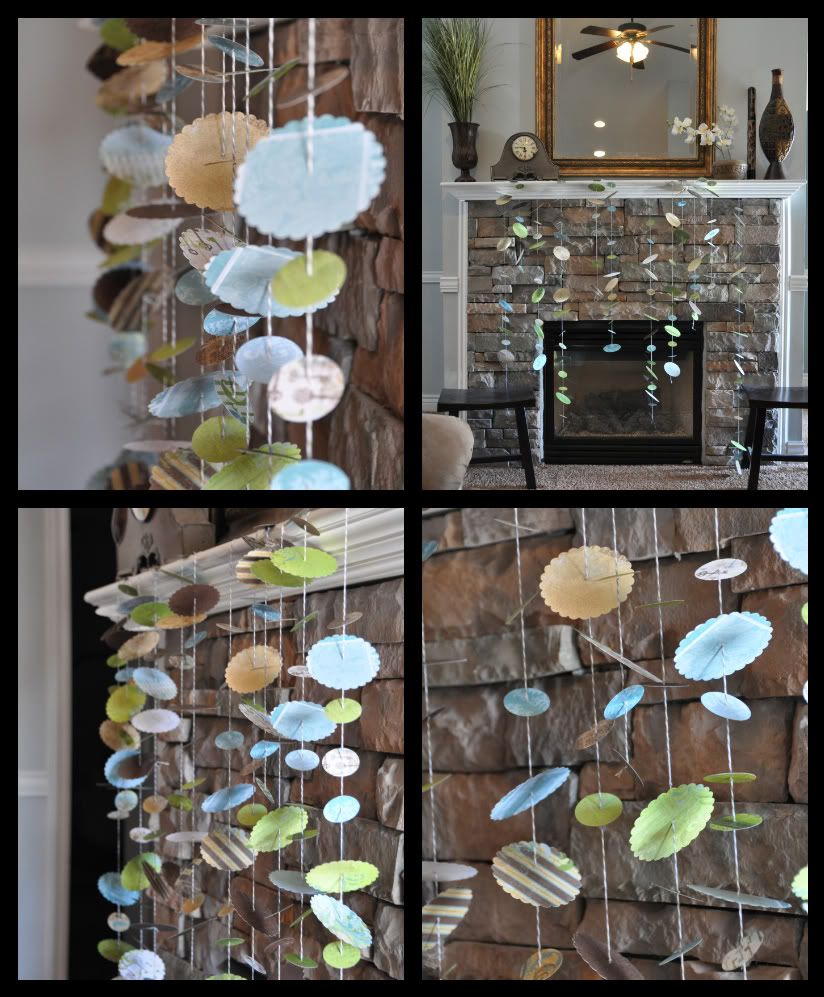
Try hanging strands from mantles, shelves, hooks, windows, ceiling, or chandeliers.
Double the Fun- You can double the impact of a vertical banner by just added a 2nd side. This tip is especially important if you are going to be hanging your banner in an area where it can be viewed from multiple angles (chandelier). When making a double sided banner, try using jump rings or ribbon to encourage the banner to spin.
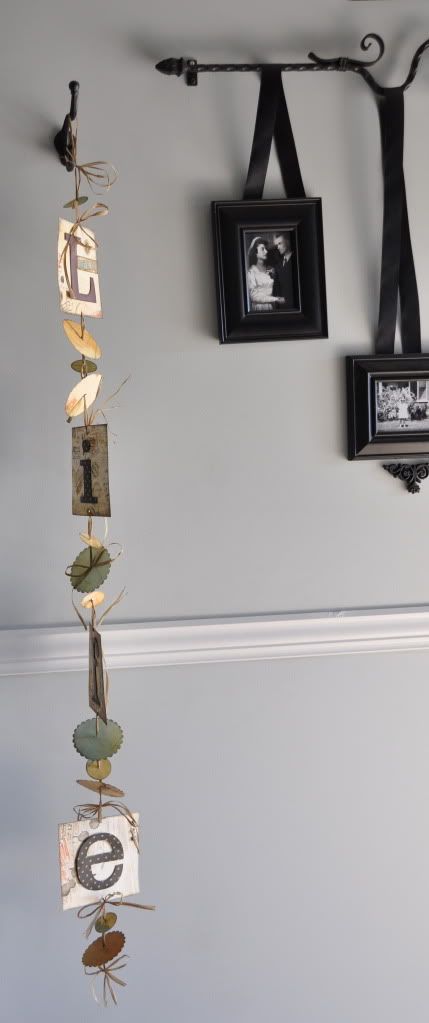
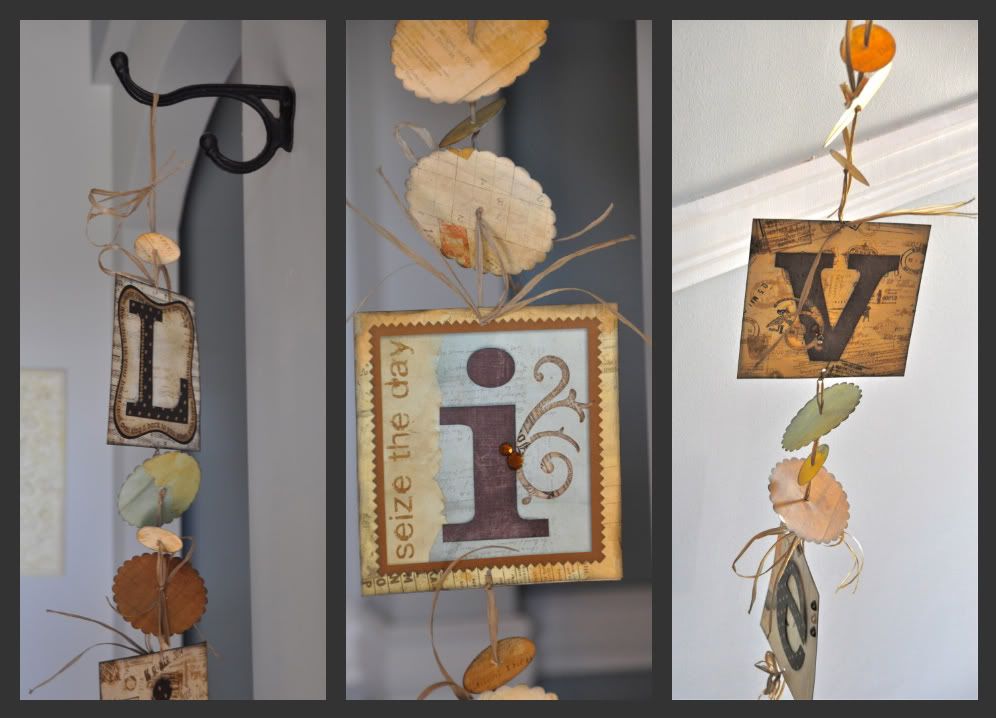
Make a “Live Life” banner by cutting 6X6 squares from Bo Bunny’s new Et Cetera line. Add your own lettering (I cut mine with my Silhouette digital cutter). Then comes the fun part of added bling and bits of fun. Link pieces together using raffia, ribbon or thread. Alternate blocks with circles or other shapes to give variety.
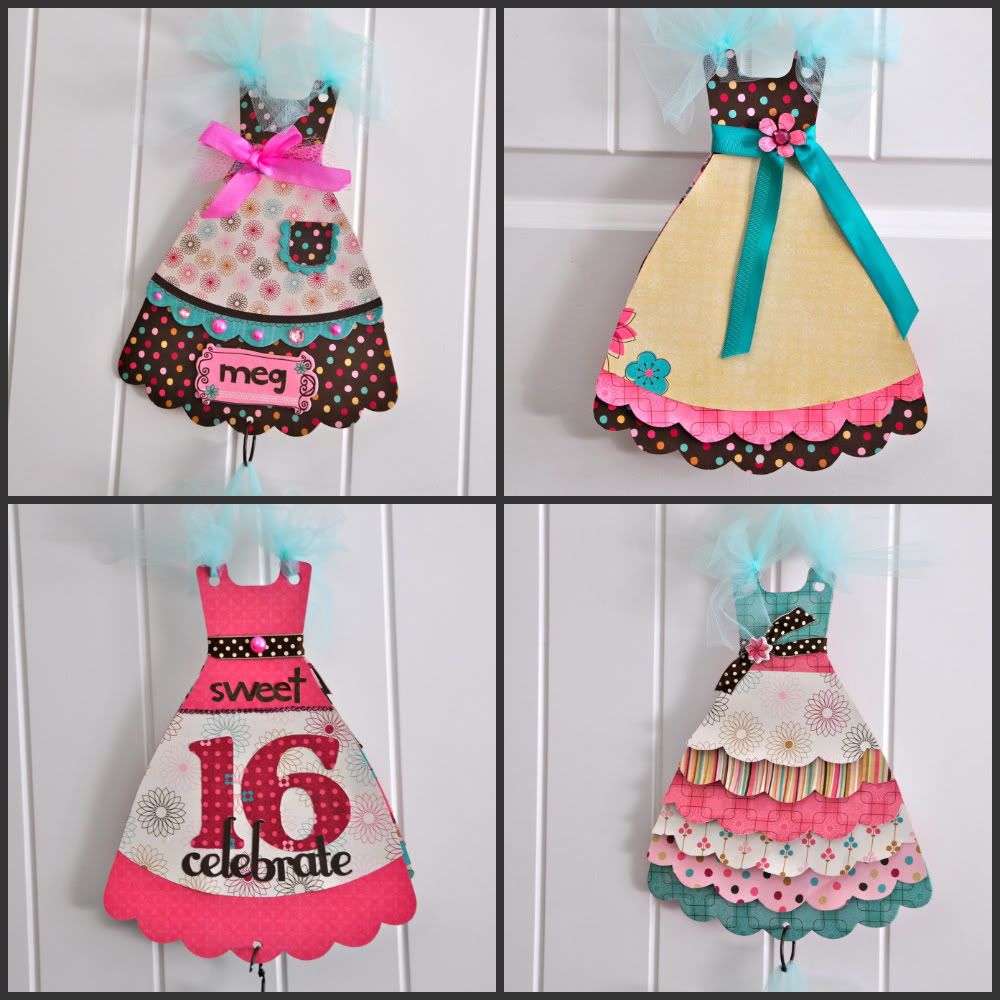
Try making turning word banners for special events like birthdays or showers.
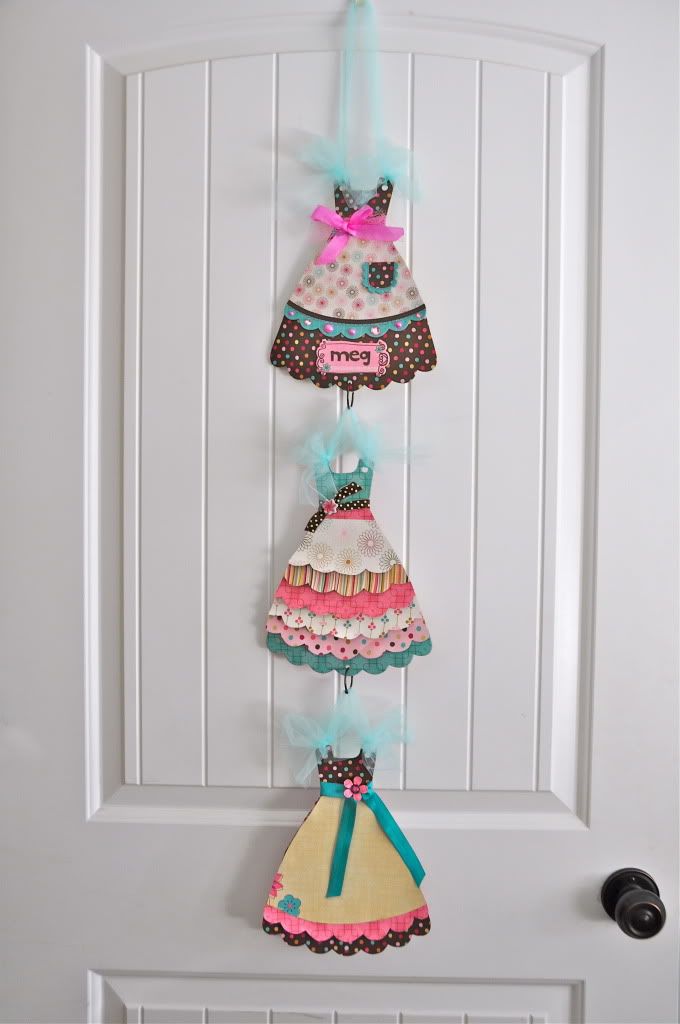
Break the Chain- When creating a vertical banner, don’t chain yourself down to single pieces placed in a solid line. Get creative with your layers and build a banner with interest.
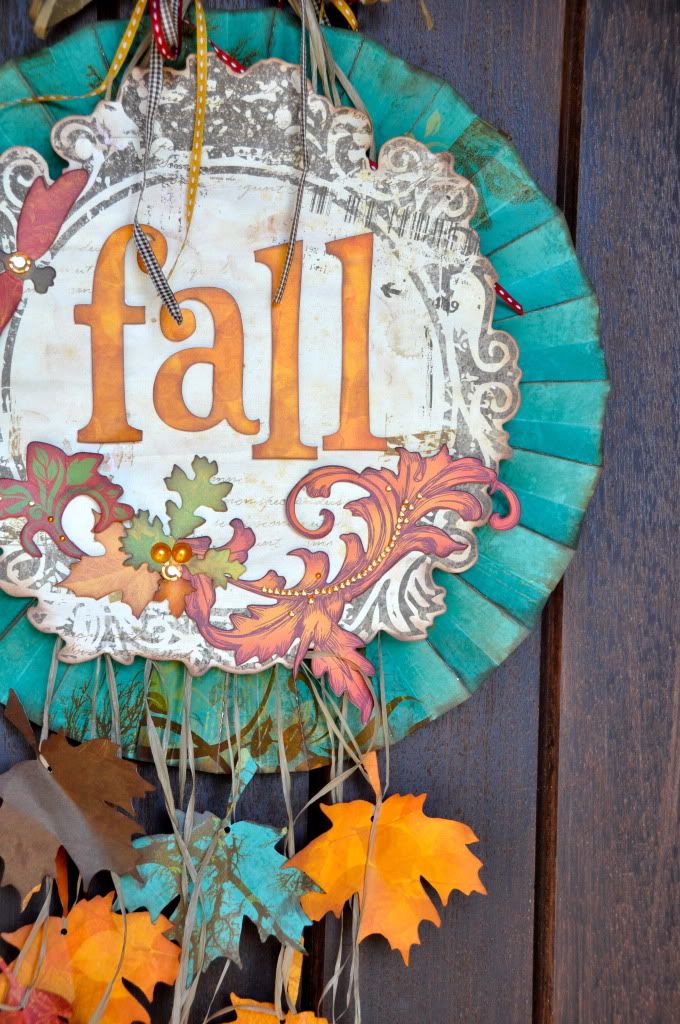

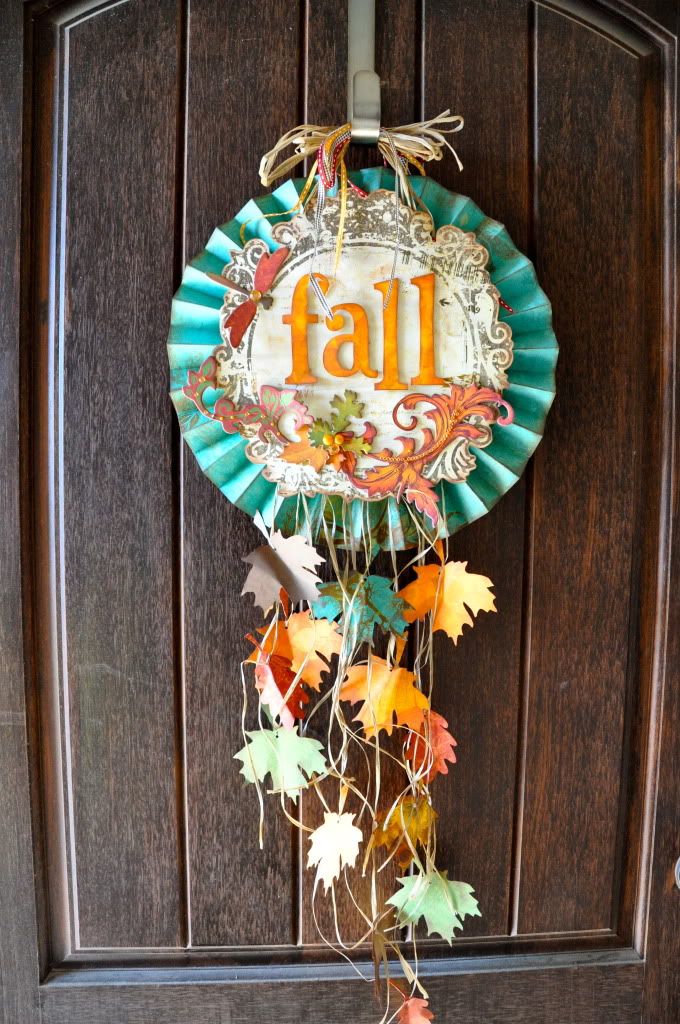
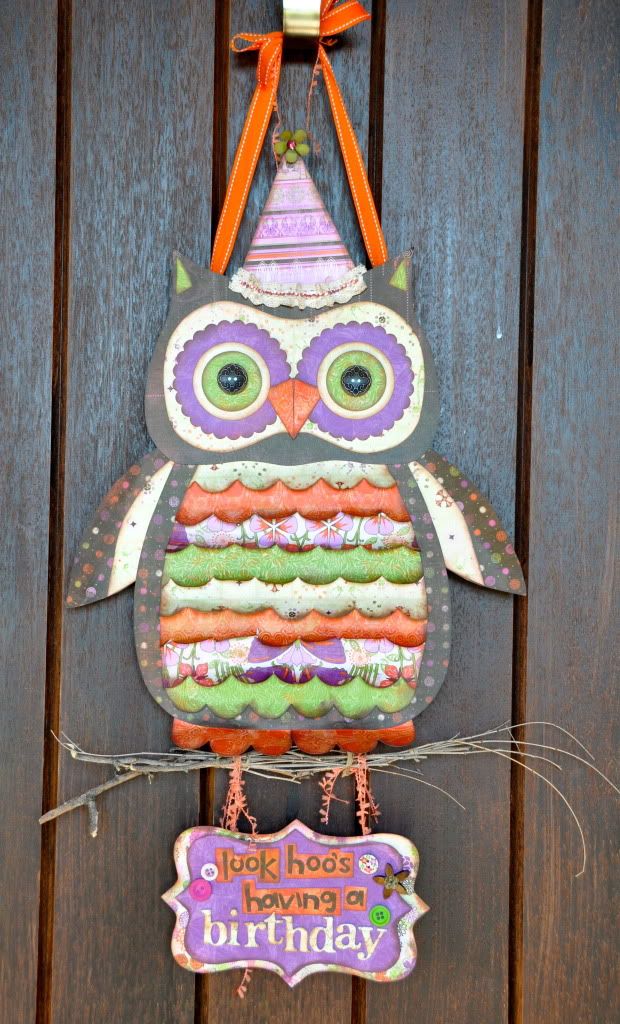
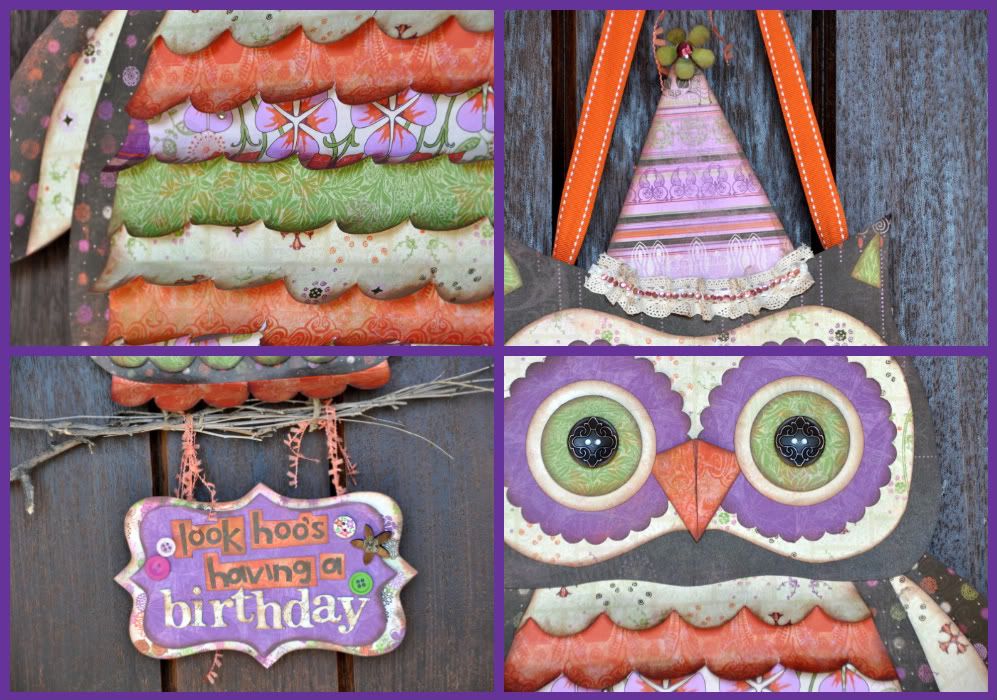
Don’t Reinvent the Wheel- There are so many ways to “upcycle” an adorable banner base. Get creative and use pre-designed pieces as a starting point for your project. Decorated chipboard albums make great building blocks for vertical decor.
Consider using other pieces like frames, plates, or wood to start your album off right.
Make a Scene- Think about telling a story with your vertical banner (this tip is especially great for door hangers). Use different shapes and paper pieced items to create a theme and give variety to your banner.
No comments:
Post a Comment