
Even if your guests aren't in the hat wearing mood, hats make an adorable decoration. Try setting a glammed up cone hat on a cake stand for a centerpiece. So cute!
I had so much fun creating and trying on these unique hats. I hope you will enjoy making your own versions. Here are a few of my ideas and patterns:
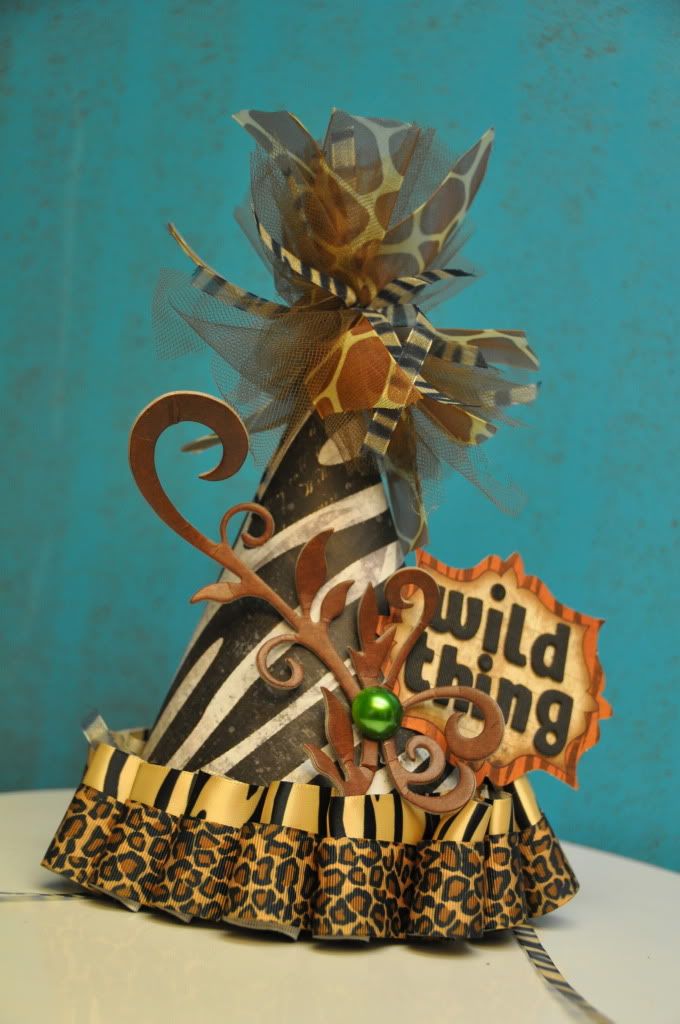
The Classic Cone:
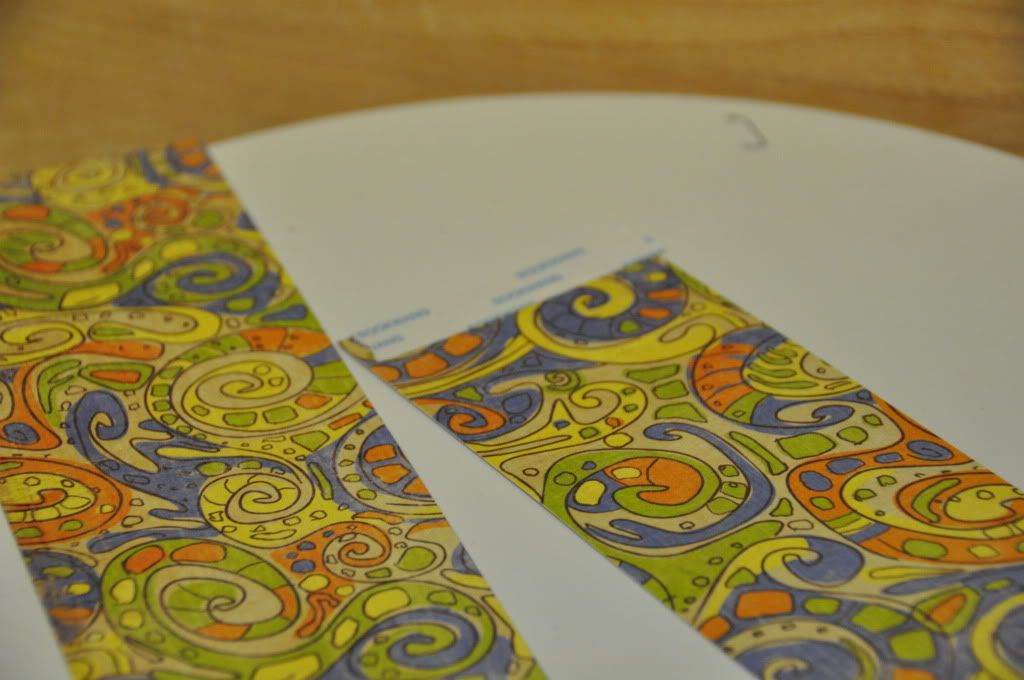
The classic cone hat is super easy to create and is also very versatile. By just changing your paper and embellishments, you can go from a blinged up diva hat to sweet baby boy topper. You can make the classic cone hat in a variety of sizes. Here is a great site for a pattern that can be resized for your individual projects:
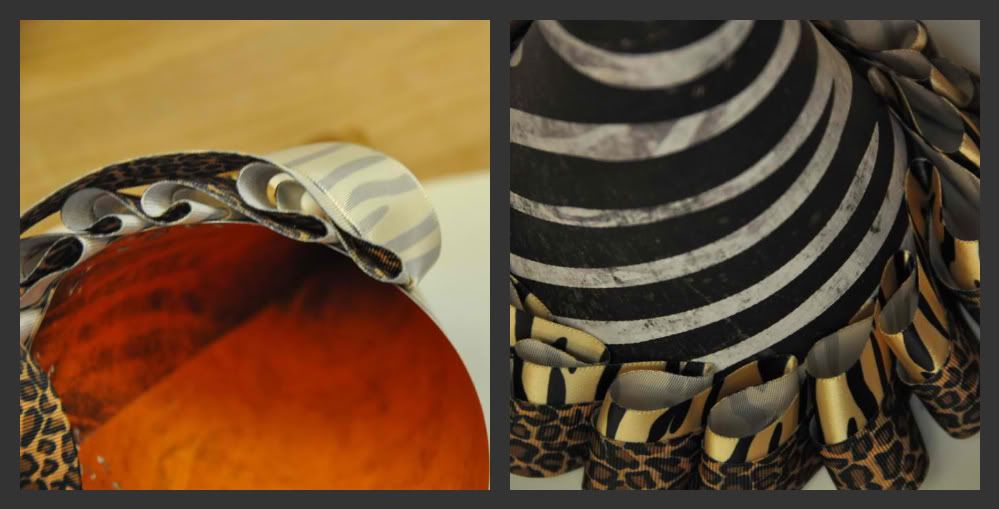
After cutting your cone from the paper of your choice decorate your hat with ribbons, embellishments and letters that fit with your theme. Start adding little bits of goodies and you will end up with a fun and original final product that will be super fun to wear! Hint-I used lots of staples and hot glue to assemble my hats. Staple tying ribbons to the hat base before adding decorations so that the staples will be hidden by the decor.
 |
| This cone was created using clear transparency paper. For the base, I stapled strips of ribbon to the cone and then covered the staples with another ribbon strip. Of course, a little bling on the bottom helped to dress it up! |
 |
| For a little fancy flair, I tied multiple bows from sparkling ribbon and attached them to the top of the cone with hot glue. Then, I attached a few pieces of large bling to the ribbon ends. |
The Pretty Tiara:
This hat is a great one for highlighting a guest of honor at a shower or event. It can be made very simply by cutting the downloadable pattern from your favorite paper. Once your hat is cut, attach a ribbon or elastic to the bottom edges, add some decorations, and you are set to crown your princess!
Get my original pattern here:
http://www.4shared.com/document/_y7JSa_a/Scan2.html?
Get my original pattern here:
http://www.4shared.com/document/_y7JSa_a/Scan2.html?
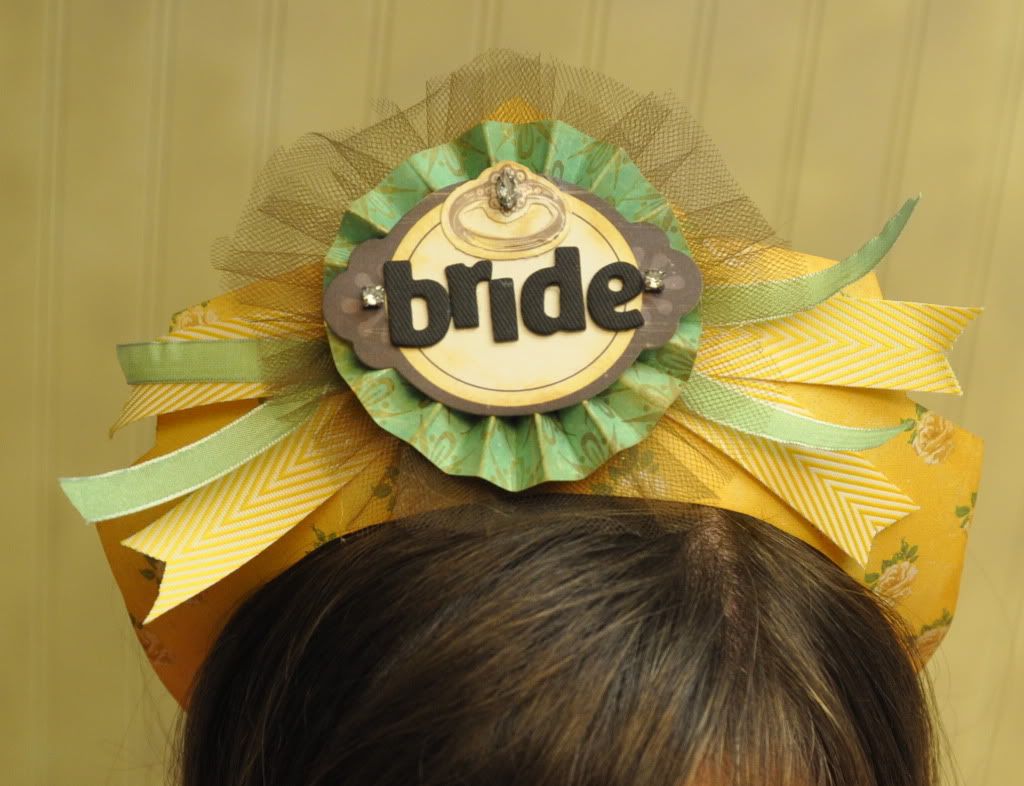 |
| I love the idea of crowning a bride during her bridal shower. To decorate this hat, I used: a handmade paper fan flower, a label sticker, some alphabet letters and bling. (This hat was made using Crate Paper's Wedding Collection). Before gluing on the main embellishment, I adhered ribbon strips and a knot of tulle to the center of the hat. |
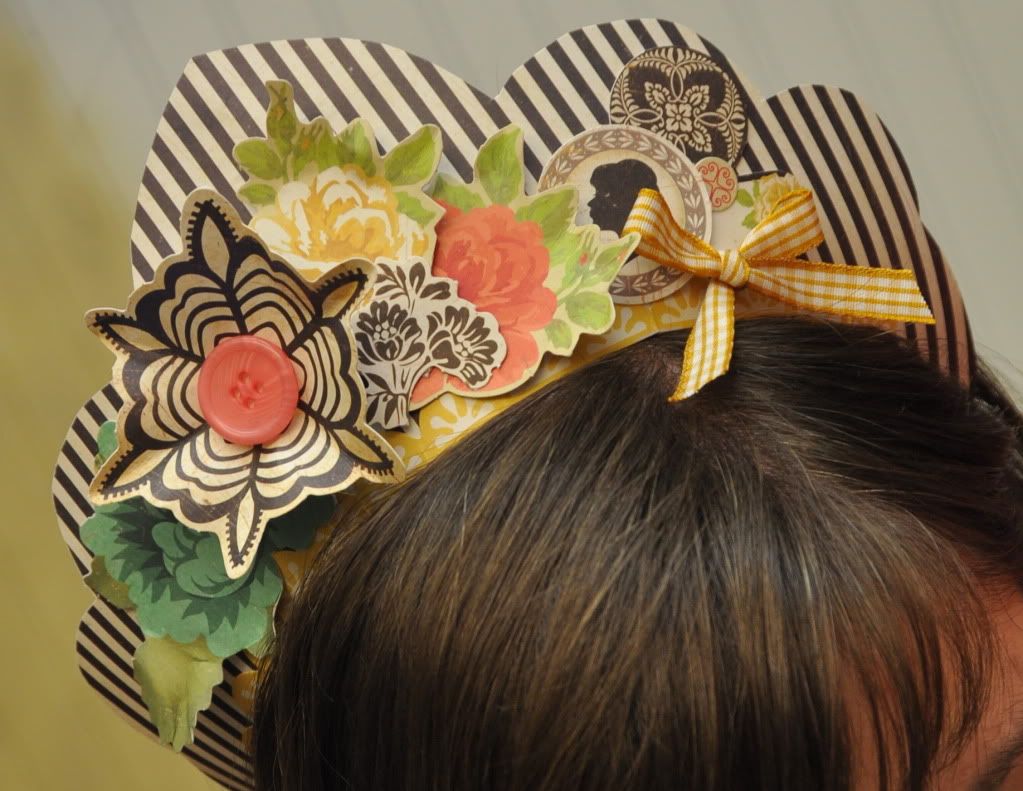 |
| I kind of want to add this hat to my daily wardrobe! To create this retro looking tiara, I popped out pre-cut flowers from Crate Paper and attached them directly to the paper base. A bit of ribbon and a few buttons completed the look. |
Better than Burger King Crown:
This very basic pattern is so easy to make and it can be dressed up to match any occasion. Because it is super inexpensive and quick, this is a great one for kids to play with.
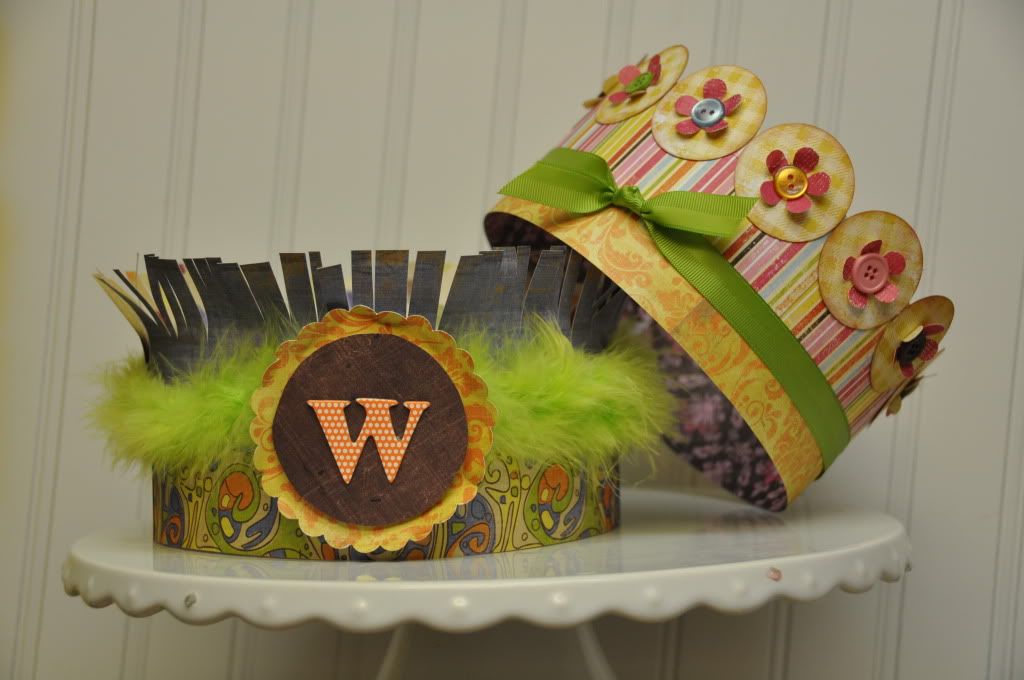 |
| I joined two strips together to make these silly hats. Get creative and involve your kids in the process. Why not just randomly make your son or daughter King or Queen for the day? |
To make these hats, cut two 3 inch strips from a piece of 12X12 pattern paper. Join the strips together and then wrap them around your head to measure the appropriate size. Decorate these simple crowns with ribbons, letters, buttons, fur and any other treats you have in your stash.
All Wired Up:
Headbands are a simple way to create a statement headpiece. For these creations, I wrapped 20 gauge wire around a headband and attached some fun paper pieces. *Hint* Cut two of your main background pieces and sandwich the wire between so that they are secure and hidden.
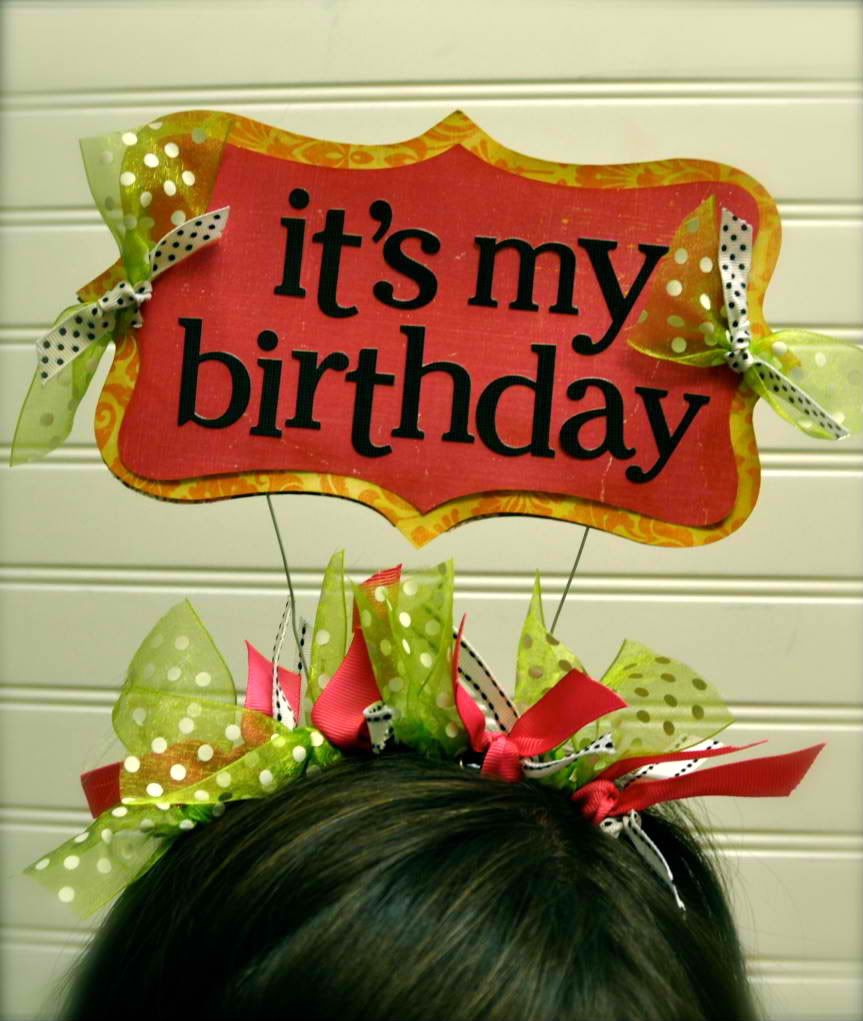 |
| After wrapping wire around the headband and attaching my birthday sign, I tied a variety of ribbon pieces around the band. The ribbon hides the wires and also adds some fun flair to the piece. What teenage girl wouldn't love wearing this headband to school on her birthday? |
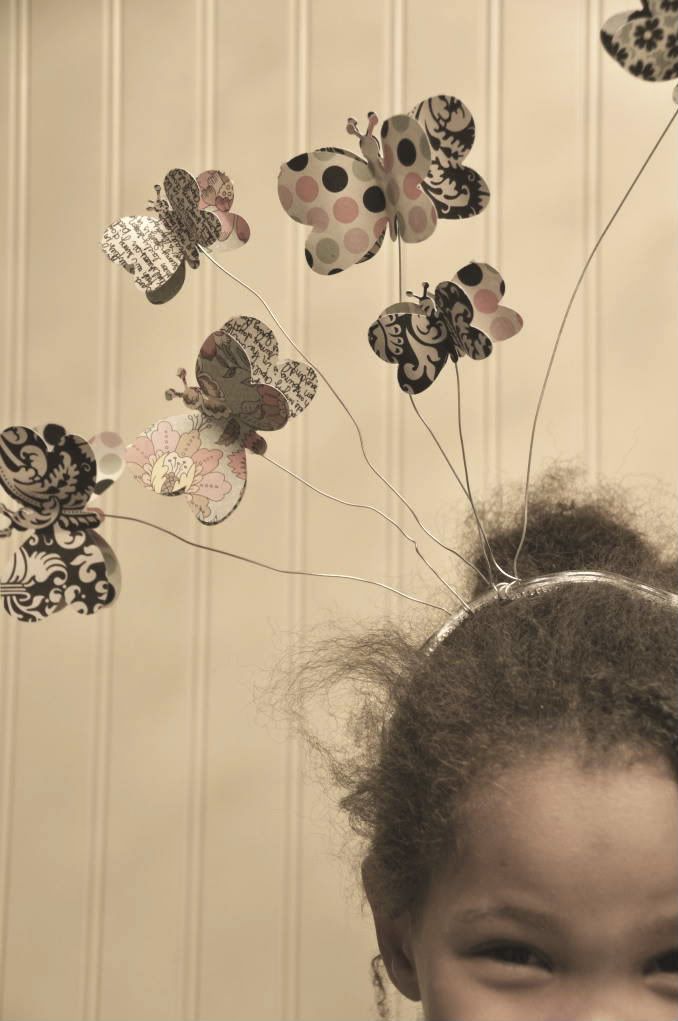 |
| This headband supports a flurry of paper butterflies. |
 |
| These butterflies were cut from my Silhouette Digital Cutter and then adhered back to back to the individual wires. |
I am so excited for you to try making your own hat creations. Be sure to share your ideas in the comments below!
No comments:
Post a Comment